Graphics Programs Reference
In-Depth Information
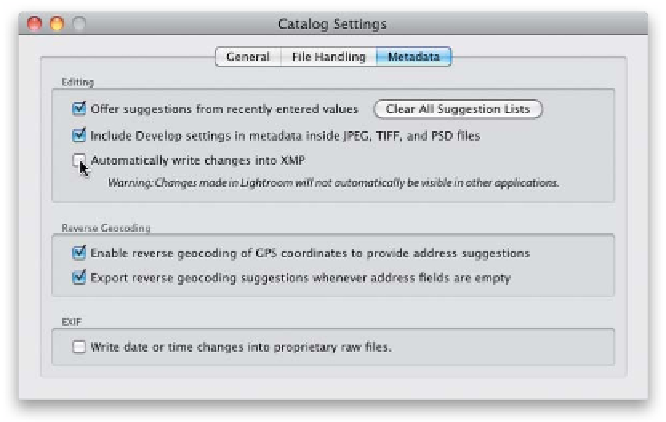
Step Five:
Now, at the bottom of the General tab,
click the Go to Catalog Settings button
(also found under the Lightroom [PC:
Edit] menu). In the Catalog Settings dialog,
click on the Metadata tab. Here you can
determine whether you want to take the
metadata you add to your RAW photos
(copyright, keywords, etc.) and have it
written to a totally separate file, so then for
each photo you'll have two files—one that
contains the photo itself and a separate file
(called an XMP sidecar) that contains that
photo's metadata. You do this by turning
on the Automatically Write Changes into
XMP checkbox, but why would you ever
want to do this? Well, normally Lightroom
keeps track of all this metadata you add in
its database file—it doesn't actually embed
the info until your photo leaves Lightroom
(by exporting a copy over to Photoshop, or
exporting the file as a JPEG, TIFF, or PSD—
all of which support having this metadata
embedded right into the photo itself).
However, some programs can't read
embedded metadata, so they need a
separate XMP sidecar file.
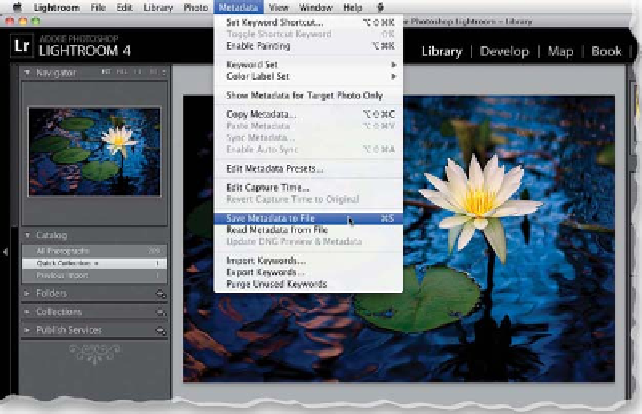
Step Six:
Now that I've shown you that Automatic-
ally Write Changes into XMP checkbox,
I don't actually recommend you turn it
on, because writing all those XMP sidecars
takes time, which slows Lightroom down.
Instead, if you want to send a file to a
friend or client and you want the meta-
data written to an XMP sidecar file, first
go to the Library module and click on an
image to select it, then press
Command-S
(PC: Ctrl-S)
, which is the shortcut for
Save
Metadata to File
(which is found under
the Metadata menu). This writes any exist-
ing metadata to a separate XMP file (so
you'll need to send both the photo and
the XMP sidecar together).