Graphics Programs Reference
In-Depth Information
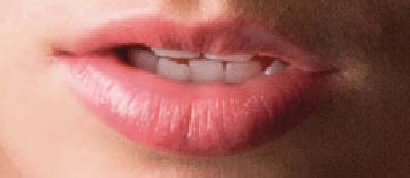
Step Seven:
Create another merged layer, then go
under the Filter menu and choose
Liquify
.
This is a filter that lets you move any part
of your subject as if it was a thick liquid
(think molasses). Zoom in pretty tight (I
zoomed to 200% here, but you can zoom
in even tighter if you want), use the top
tool in the Toolbar along the top left
side (the Forward Warp tool), turn on the
Advanced Mode checkbox, make sure your
brush size is really small using the Brush
Size slider (see my brush tip on the far right
corner of her mouth?) and literally nudge
(or push) the tops of the individual teeth
upward to fill in any gaps. When you get
to the spot where I'm painting, after you
raise the height of that tooth, you'll see a
gap between the two bottom teeth now.
Just push the sides of the two teeth gently
together. The key to using this tool is to
move slowly, nudge gently, and use a small
brush (actually, choose a brush that's the
size of the thing you want to move, but
in this case, it's small teeth, so use a small
brush size). You can see the before photo
at the bottom here. Now click OK.
Before
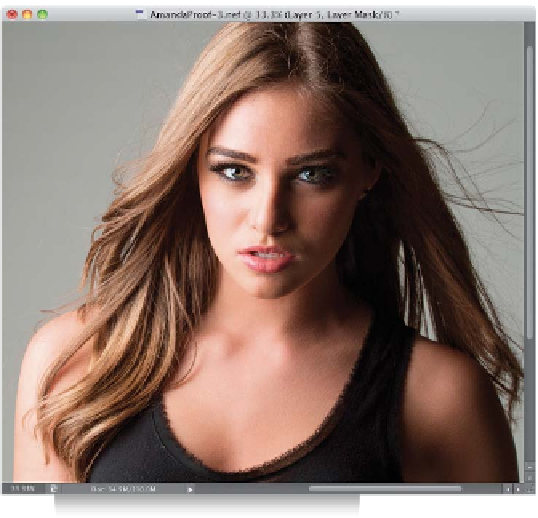
Step Eight:
Create yet another merged layer, because
now we're going to add highlights to her
hair, but instead of just painting all over
the left side of her hair, here in Photoshop,
it's easier to be much more accurate and
actually just paint over the individual high-
light areas. Before you do that, of course,
we need our layer to be brighter, so change
its blend mode from Normal to
Screen
.
Then hide the layer behind a black mask
(you know the routine), and then with
the Brush tool, paint in white over just
the highlight areas. Once it's all painted
in, lower the layer's opacity until it looks
realistic, which in this case I thought was
around 40% (the highlights look much
better this time around).