Graphics Programs Reference
In-Depth Information
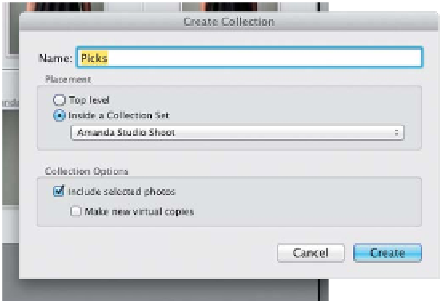
Step Five:
Now, press
Command-A (PC: Ctrl-A)
to select all the Picks, and then press
Command-N (PC: Ctrl-N)
to create a new
collection. When the dialog appears, name
this collection “Picks,” click on the Inside a
Collection Set radio button, and from the
pop-up menu, choose the Amanda Studio
Shoot set we made back in Step One (see,
I told you we'd wind up using this later
on). Make sure the Include Selected Photos
checkbox is turned on (so these selected
photos wind up in this new collection
automatically), and click the Create button.
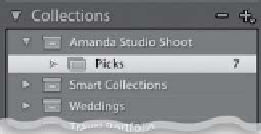
This saves your Picks into their own collec-
tion inside your Amanda Studio Shoot set
(shown here at the bottom). At this point,
all our Picks are still flagged, but since
they're in their own collection now, we
need to remove the flags for the next step.
So, select them all, then press the letter
U to unflag them. (For more on collections,
see page 56 in Chapter 2).
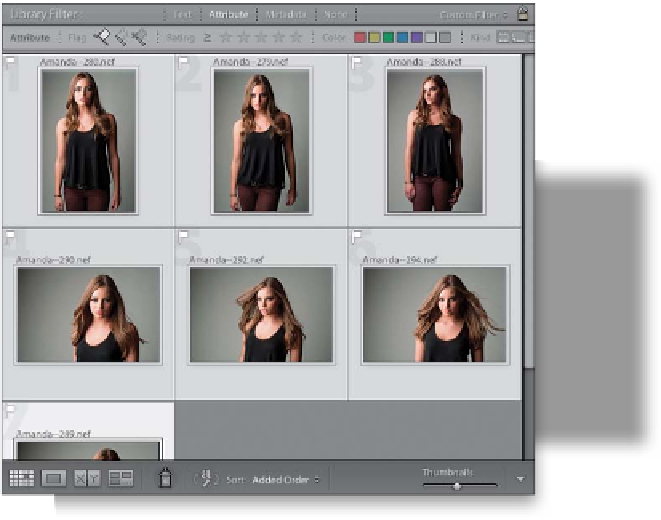
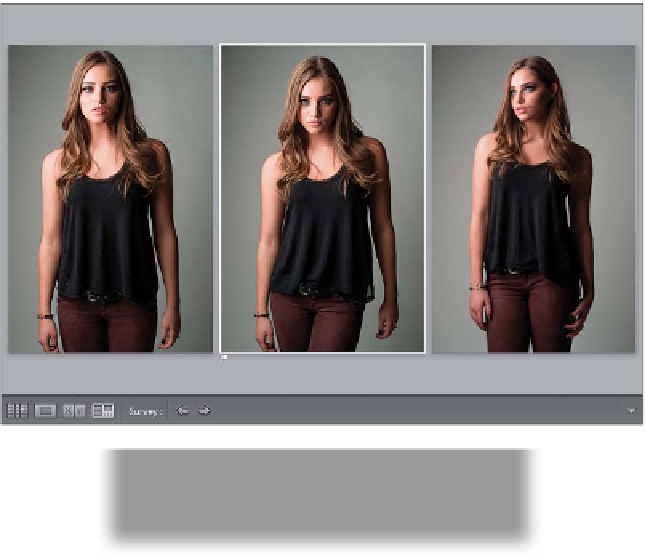
Step Six:
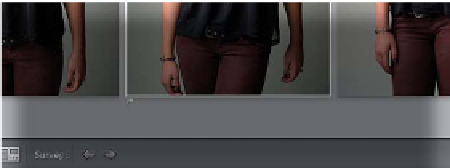
It's time to narrow things down even
further—to the images we'll send to the
client for approval. To help with this,
I select any images in this Picks collection
with a similar pose and go into Survey
view by pressing the letter
N
. The images
show up together onscreen, and I keep
removing my least favorite shot until I
wind up with just one or two of a pose
I like. I click on that image (as seen here,
where I clicked on the center image), then
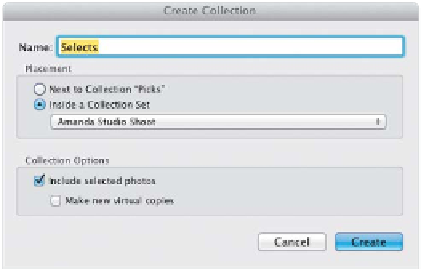
I flag it as a Pick. Press G to return to the
Grid view, select another set of images
with the same pose, and narrow things
down the same way (I wound up with
three photos that are my Selects). Turn on
the Picks flag filter up in the Library Filter,
select all the images flagged as Picks, create
a new collection, name it “Selects,” and
save it in your Amanda Studio Shoot set.