Graphics Programs Reference
In-Depth Information
Once the shoot is over, before you start the sorting/editing process in Lightroom
and Photoshop, you've got some absolutely critical “first-things-first” stuff to do,
and that is to back up your photos, right now, before anything else—I actually
back up even when I'm on location shoots (using two OWC Mercury On-The-Go
High-Speed 80-GB portable hard drives). Here's the step by step on backing up:
Step One:
When you shoot tethered (directly from
your camera to your laptop, like I did at
this shoot), your photos are already in your
computer, and they're already in Lightroom,
but they're not backed up anywhere yet—
the only copies of those photos are on
that computer. If anything happens to
your laptop, those photos are gone for-
ever. So immediately after the shoot, I
back up those photos. Although you
can see the photos in Lightroom, you
need to back up the photo files them-
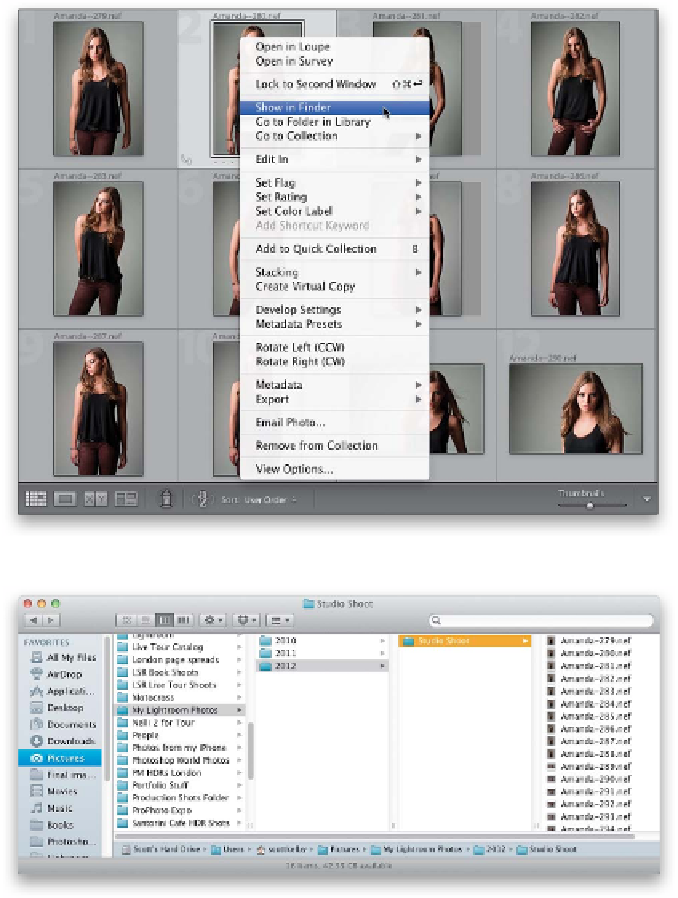
selves. A quick way to find that folder is
to go to Lightroom and Right-click on
a photo from that shoot and choose
Show in Finder (PC: Show in Explorer)
from the pop-up menu, as shown here.
Step Two:
This opens a Finder (PC: Windows Explor-
er) window of the folder with your actual
photo files inside, so click on that folder
and drag the whole thing to your backup
hard drive (this has to be a separate external
hard drive—not just another partitioned
disk on the same computer). If you don't
have an external drive with you, then at the
very least, burn that folder to a CD or DVD.