Graphics Programs Reference
In-Depth Information
Step Five:
Now you're ready to start dragging-and-
dropping photos into your layout. If you
drag one that doesn't look good in your
layout, just drag another right over it. You
can reposition your photo inside a smaller
cell by pressing-and-holding the Command
(PC: Ctrl) key, then just dragging the image
left/right (or up/down), so just the part
you want is showing.
Step Six:
You can stack images so they overlap,
almost like they're Photoshop layers. Let's
start from scratch again, but first click
the Page Setup button (at the bottom
left), and turn your page orientation to
Landscape. Now go back to the Cells panel,
click the Clear Layout button, then click
the 8x10 button, resize it, and position it
so it takes up most of the page (as shown
here). Now, click the 2x2.5 button three
times, make each cell a little wider (like the
ones seen here), and position them so they
overlap the main photo, as shown. Drag-
and-drop photos on each cell. You can
move the photos in front or behind each
other by Right-clicking on the photo, and
from the pop-up menu, choosing to send
the photo back/forward one level or all the
way to the bottom/top of the stack. If you
want to add a white photo border around
your images (like I have here), go up to
the Image Settings panel and turn on the
Photo Border checkbox. Also, when you're
done, try switching your Page Orientation
back to Portrait and see how that looks—
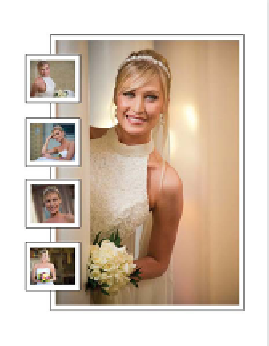
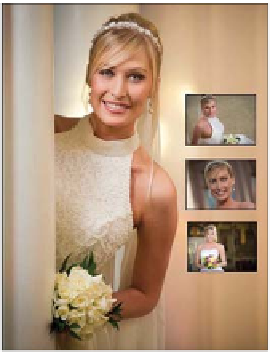
you might be surprised. For example,
I switched it, and thought it might make
a good wedding book layout, so I swapped
out the photos, rotated the small cells, then
added a fourth small cell, and made the
main photo a little thinner (as shown on
the bottom right). It only took about 30
seconds. I also tried just rotating the three
small cells and making the main photo fill
the page (as shown on the bottom left).