Graphics Programs Reference
In-Depth Information
The reason you jumped through all those hoops just to print one photo was
because the whole Single Image/Contact Sheet was really designed for you to have
quick access to multi-photo layouts and contact sheets, which is where this all gets
really fun. We're picking up here, with the same set of photos, to show you how
easy it is to create really interesting multi-photo layouts that clients just love!
Step One:
Start by clicking on any of the multi-photo
templates that come with Lightroom 4
(if you hover your cursor over any of the
templates in the Template Browser, a pre-
view of the layout will appear in the Preview
panel at the top of the left side Panels area).
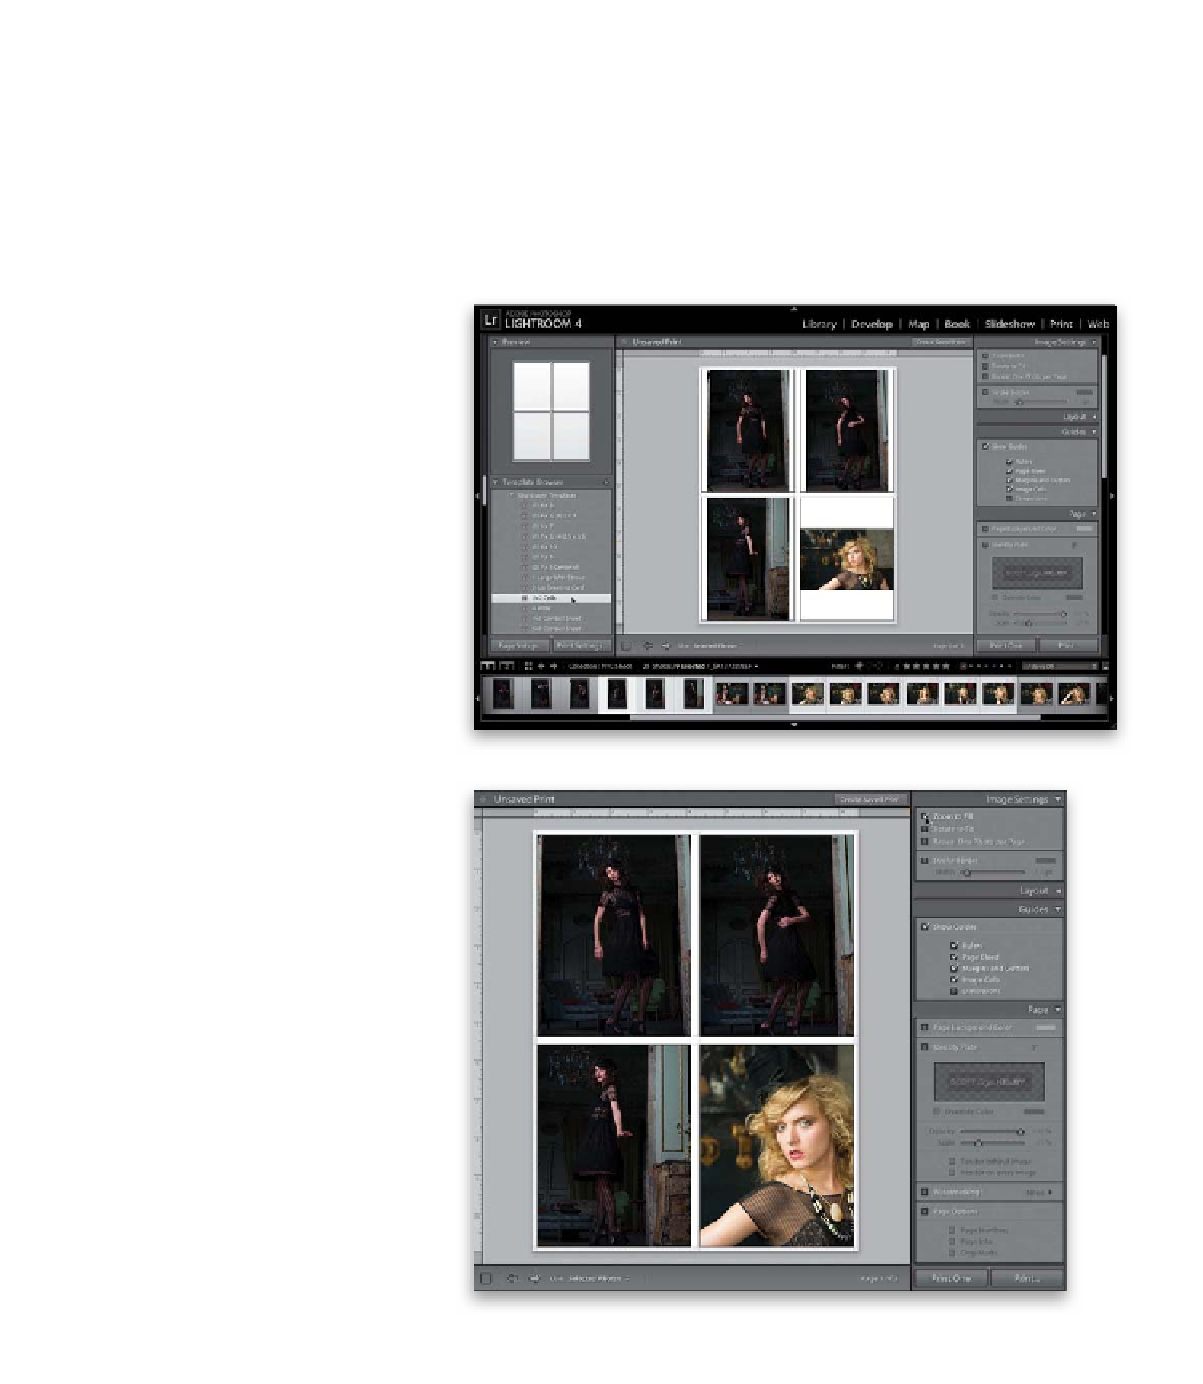
For example, click on the 2x2 Cells template,
and it puts your selected photos in two
columns and two rows (as shown here).
Here, I selected nine photos, and if you look
at the right end of the toolbar, you'll see
Lightroom will make three prints, though
only two will have four photos each—the
last print will just have that one leftover
photo. The layout you see here doesn't look
that good, because we're mixing tall photos
with a horizontal photo, but we can fix that.
Step Two:
Of course, just printing all your tall photos
on a page with tall cells, and then creating
a second template with wide cells, would
fix this, but an easier way is to go to the
Image Settings panel and turn on the Zoom
to Fill checkbox (as shown here). This zooms
all the images up to fill the cells, so that
wide photo in the bottom-right corner
zooms in, and how it fills the cell looks uni-
form (as seen here). Plus, you can reposition
the images in their cells by clicking-and-
dragging them. However, turning on Zoom
to Fill cropped a tiny bit off of the three
tall shots, and quite a bit off the wide shot,
changing the whole look of the photo
(luckily, there is a way around this, too).