Graphics Programs Reference
In-Depth Information
Besides adding text using the Identity Plate, you can add other lines of text to your
photo (either custom text that you type in, or info that Lightroom pulls from the
photo's EXIF data, or any metadata you added when you imported the photos,
like your copyright info). You can also add a watermark to your slide show images,
in case you're sending this slide show to a client or posting it on the web.
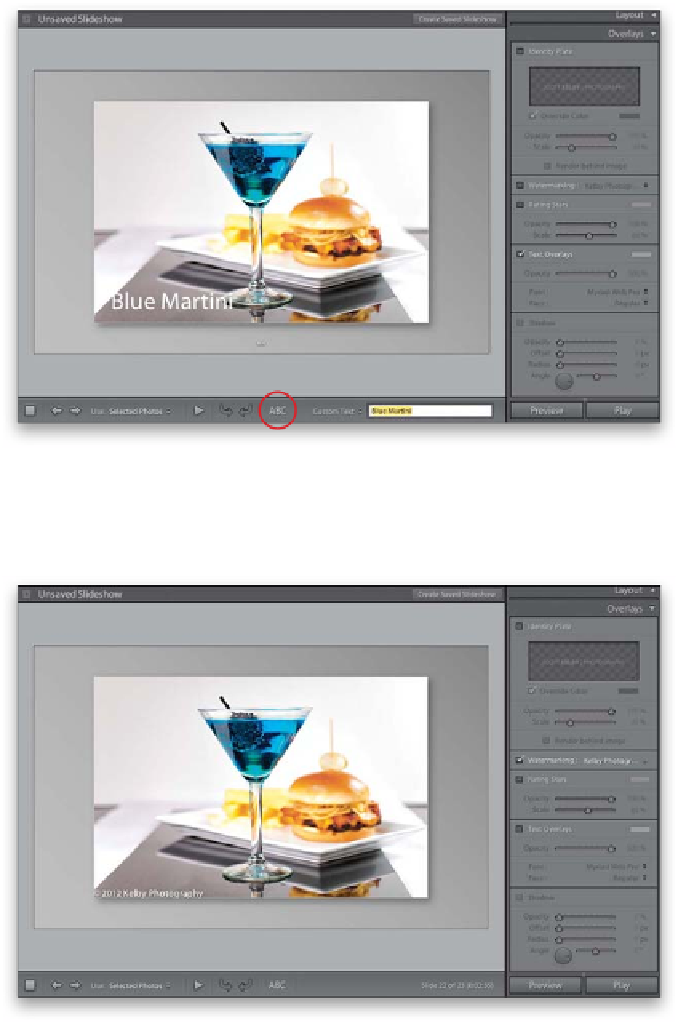
Step One:
To add text, click on the ABC button down
in the toolbar (shown circled here in red),
and a pop-up menu and text field will
appear to the right of it. The default setting
is Custom Text, and you can simply type
the text you want in the text field, and then
press the Return (PC: Enter) key. Your text
appears on your slide with a resizing border
around it. To resize your text, click-and-drag
on any corner point. To move the text, just
click right on it and drag it where you want
it. If you click-and-hold on the words Cus-
tom Text in the toolbar, a pop-up menu
appears that lets you choose text that may
be embedded into your photo's metadata.
For example, if you choose Date, it displays
the date the photo was taken. If you choose
any of the other options, it only displays
that info if it's in the file (in other words, if
you didn't add caption info in the Metadata
panel, choosing Caption here won't get
you anything).
Step Two:
If you set up a watermark (see page 276),
you can add that, as well (or instead of the
additional text). Go to the Overlays panel
and turn on the Watermarking checkbox,
and then choose your watermark preset
from the pop-up menu (you can see the
watermark here at the bottom left). The
advantage of using a watermark (rather than
custom text) is that you can use pre-made
templates, where you also can lower the
opacity so it's see-through, and doesn't fully
cover the image behind it.