Graphics Programs Reference
In-Depth Information
One of my favorite features in Lightroom 4 is the built-in ability to shoot teth-
ered (shooting directly from your camera into Lightroom), without using third-
party software, which is what we used to do. The advantages are: (1) you can
see your images much bigger on your computer's screen than on that tiny LCD
on the back of the camera, so you'll make better images; and (2) you don't have
to import after the shoot—the images are already there.
Warning:
Once you try
this, you'll never want to shoot any other way.
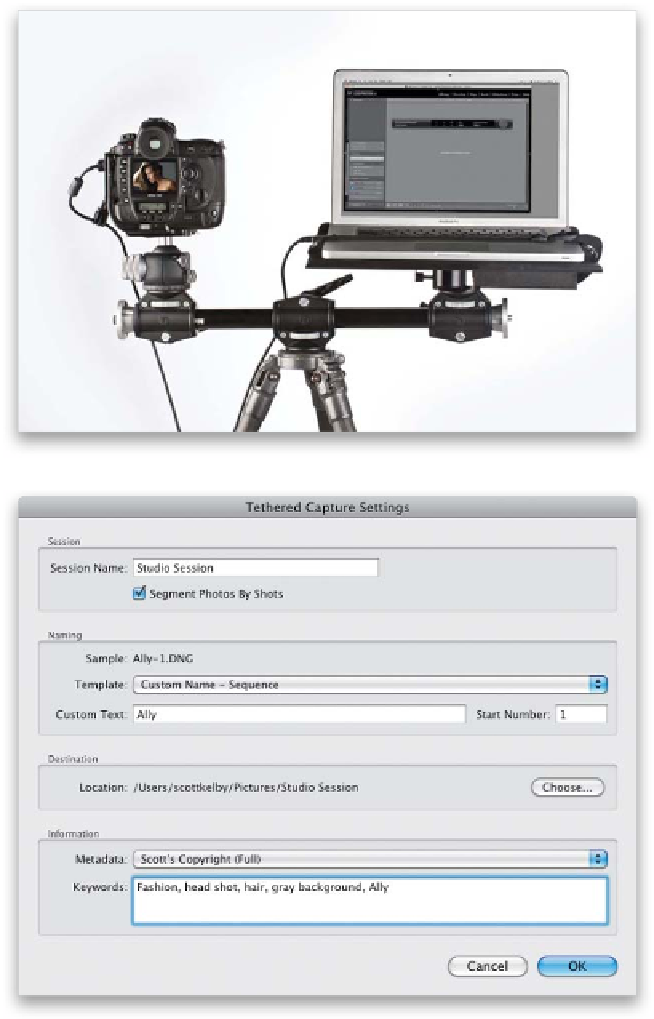
Step One:
The first step is to connect your camera
to your computer using that little USB cable
that came with your camera. (Don't worry,
it's probably still in the box your camera
came in, along with your manual and some
other weird cables that come with digital
cameras. So, go look there for it.) Go ahead
and connect your camera now. In the studio,
and on location, I use the tethered setup
you see here (which I learned about from
world-famous photographer Joe McNally).
The bar is the Manfrotto 131DDB Tripod
Accessory Arm, with a TetherTools Aero
Traveler Tether Table attached .
Step Two:
Now go under Lightroom's File menu,
under Tethered Capture, and choose
Start
Tethered Capture
. This brings up the
dialog you see here, where you enter pretty
much the same info as you would in the
Import window (you type in the name of
your shoot at the top in the Session Name
field, and you choose whether you want the
images to have a custom name or not. You
also choose where on your hard drive you
want these images saved to, and if you want
any metadata or keywords added—just
like usual). However, there is one important
feature here that's different—the Segment
Photos By Shots checkbox (shown circled in
red here)—which can be incredibly handy
when you're shooting tethered (as you'll see).