Graphics Programs Reference
In-Depth Information
Step Three:
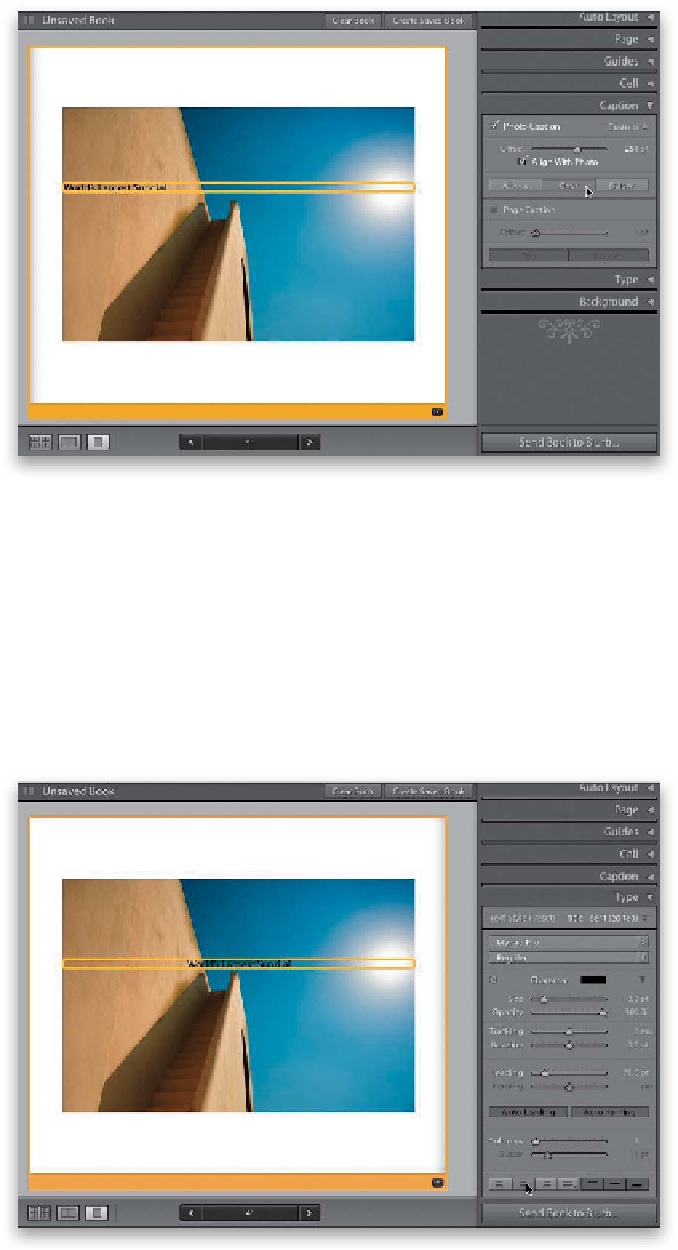
You also have the choice to move your
caption above your photo, or to put your
caption right over the photo itself (as
seen here) using the three buttons below
the Offset slider: Above, Over, and Below.
Click the Over button and your text box
now appears right over the photo, and
the Offset slider controls how high your
caption appears over it (as you slide it
back and forth, you'll see your caption
move up and down the photo).
Note:
If
you choose to add a caption to a full-
page photo layout, the only option you'll
have for placement is Over, since there's
no white space above or below the photo
to fit a caption.
Step Four:
By default, your text is aligned with the
left side of your photo, but if you go to
the bottom of the next panel down, the
Type panel, you'll se e alig nment but tons—
you can choose Align Left, Align Center
(as shown here), or Align Right (the fourth
choice is Justification, which only comes
into play if you're using columns of text).
Note:
If your Type panel doesn't look like
this one (you see a lot fewer sliders), then
you just need to click on the little black
left-facing triangle to the far right of the
word “Character” and this expands the
panel down to show more options.
Continued