Graphics Programs Reference
In-Depth Information
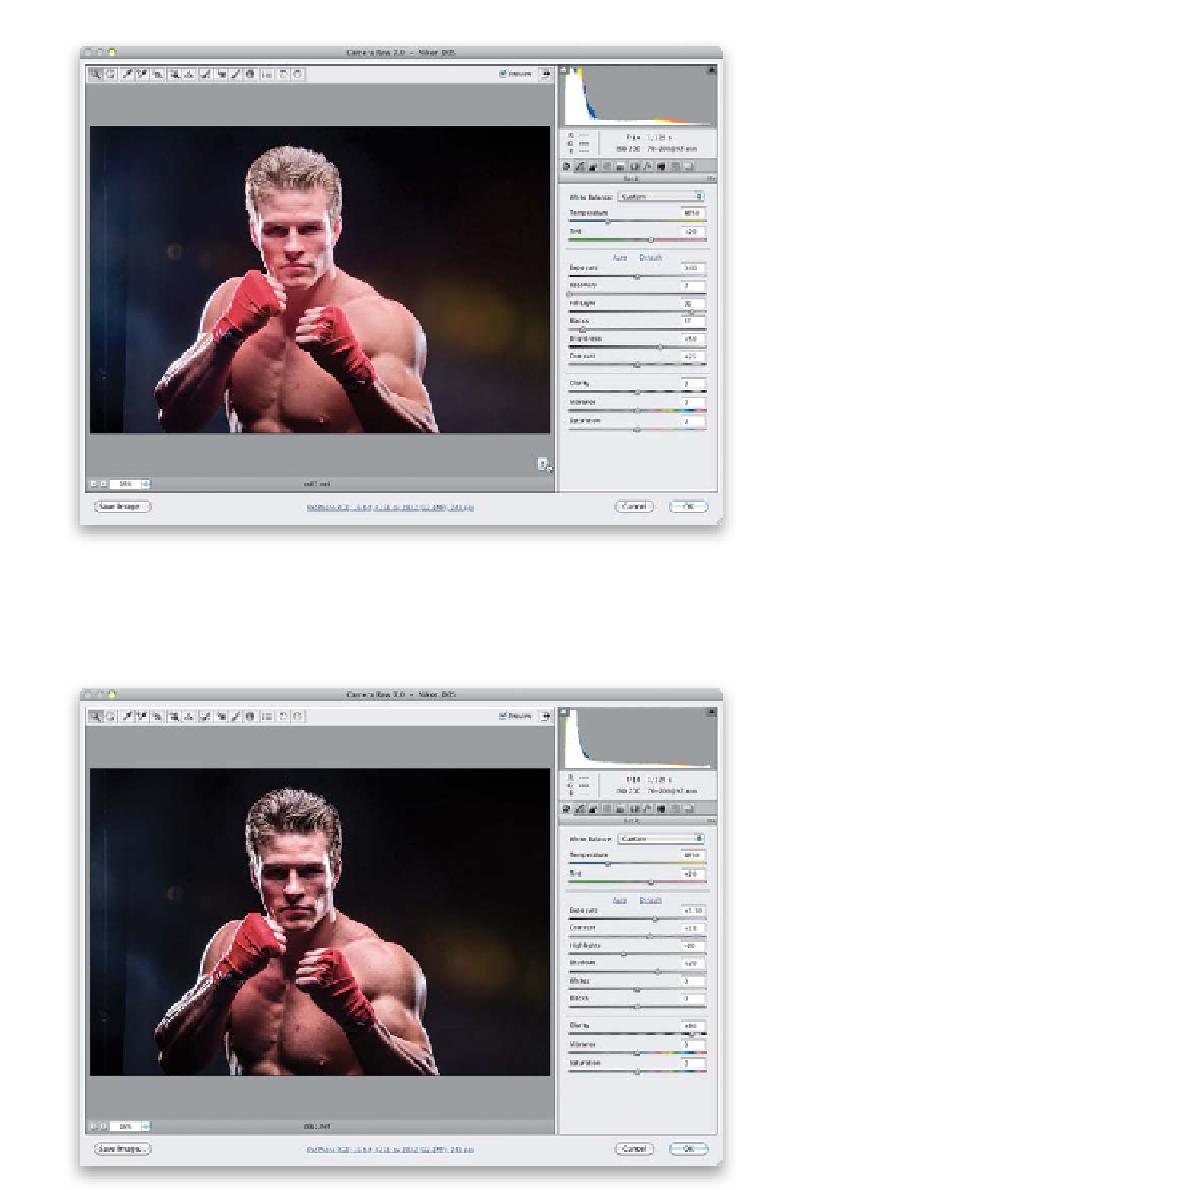
Step Five:
Now, double-click on the layer thumbnail
for the original smart object layer and it
opens in Camera Raw, where you'll see
a little exclamation point warning in
the bottom-right corner of your image
letting you know it's processed with the
old 2010 process version. Click on that
warning icon and it updates you to the
2012 version and the new sliders.
Step Six:
Here's where I'd crank up the Clarity
(I went to +80), which is
so
much better
in Lightroom 4, and because the new
process made this image darker, I had to
make it a lot brighter by increasing the
Exposure. Also, you might increase the
Contrast and Highlights a bit, and decrease
the Shadows. When you're done, just click
OK to go back to Photoshop.
Continued