Graphics Programs Reference
In-Depth Information
Step Five:
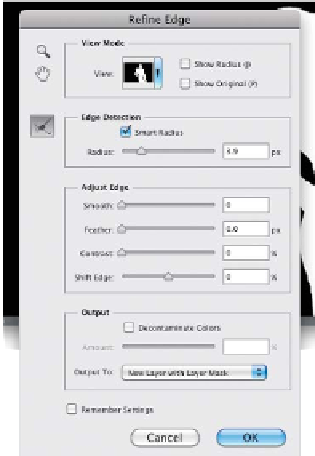
Ahhhh, now comes the magic. The reason
your selection doesn't have to be perfect
is that the real power of selecting happens
now. Selecting his jersey and stuff is easy,
but making a selection where you keep
his hair intact is the tricky part. Back in
Photoshop CS5, though, Adobe tweaked
the Refine Edge tool to do most of the
tricky stuff for you. So, while your selection
is still in place, click the Refine Edge button
up in the Options Bar to bring up the
Refine Edge dialog (shown here). At the top,
you can choose how to view your selection.
I chose the Black & White view here, so you
can really see what's going on. To select
his hair, you'll need to turn on the Smart
Radius checkbox, then drag the Radius
slider to the right until you see his hair start
to become selected. Once it gets kinda close,
move your cursor right along the outside
edge of his hair and paint to let Photoshop
know where the tricky part is (you're paint-
ing with the Refine Radius tool, here).
Step Six:
Also, set the size of your Refine Radius
brush to a very small size using the
[ (Left
Bracket) key
on your keyboard (to the
right of the letter P). Now, when you use
this tool, it often “digs in” a little too much
into the head (if you see little gaps extend-
ing into his head, that's what I'm talking
about), but we'll fix that in the next step,
so for now, just try to paint enough so
the outside edge of his hair looks selected.
You c an als o change your view u sing the
View pop-up menu, if that helps. When it
looks pretty decent, in the Output sec-
tion at the bottom of the dialog, from
the Output To pop-up menu, choose
New
Layer with Mask
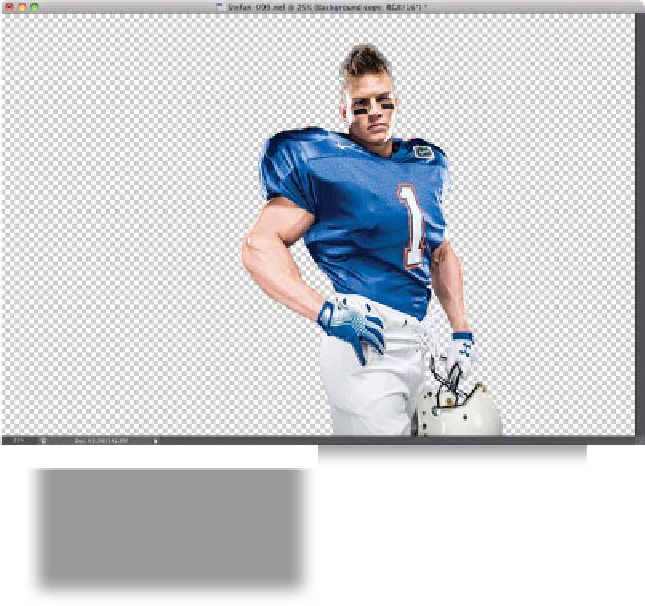
, then click OK, and you
get the image you see here—our subject
on a transparent background. Choosing
New Layer with Mask lets us tweak our
mask, and that makes a big difference.
Continued