Graphics Programs Reference
In-Depth Information
Step 14:
Right below that is a panel called
Apply During Import, which is where
you can apply three things to your images
as they're imported. Let's start at the top.
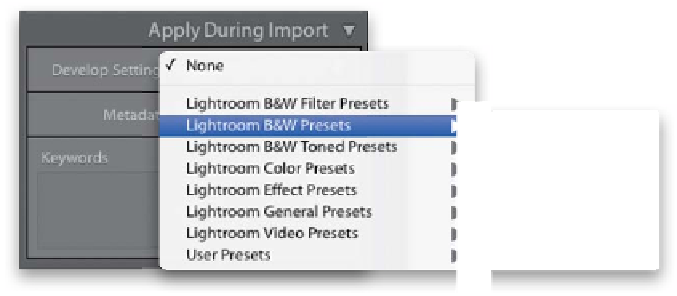
The Develop Settings pop-up menu lets
you apply special effects or corrections
automatically as your photos are imported.
For example, you could have all your pho-
tos appear in Lightroom already converted
to black and white, or they could all already
be adjusted to be more red, or blue, or…
whatever. If you click on the Develop
Settings pop-up menu, you'll see a list of
built-in presets that come with Lightroom
and if you choose one, that look gets ap-
plied to your images as they're imported
(you'll learn more about these, along with
how to create your own custom Develop
presets in Chapter 6, so for now, just leave
the Develop Settings set to None, but at
least you know what it does).
Step 15:
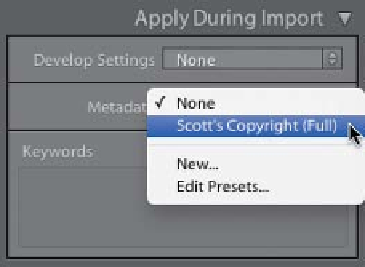
The next pop-up menu, Metadata, is
where you can embed your own personal
copyright and contact info, usage rights,
captions, and loads of other information
right into each file as it's imported. You
do this by first entering all your info into
a template (called a metadata template),
and then when you save your template,
it appears in the Metadata pop-up menu
(as shown here). You're not limited to just
one template—you can have different ones
for different reasons if you like (like one of
just your copyright info, and another with
all your contact info, as well). I show you,
step by step, how to create a metadata
template on page 38 of this chapter, so
go ahead and jump over there now and
create your first metadata template, then
come right back here and choose your
copyright template from this pop-up
menu. Go ahead. I'll wait for you. Really,
it's no bother. (
Note:
I embed my copy-
right info into every photo [well, at least
the ones I actually shot] using a metadata
template like this while importing.)
Continued