Graphics Programs Reference
In-Depth Information
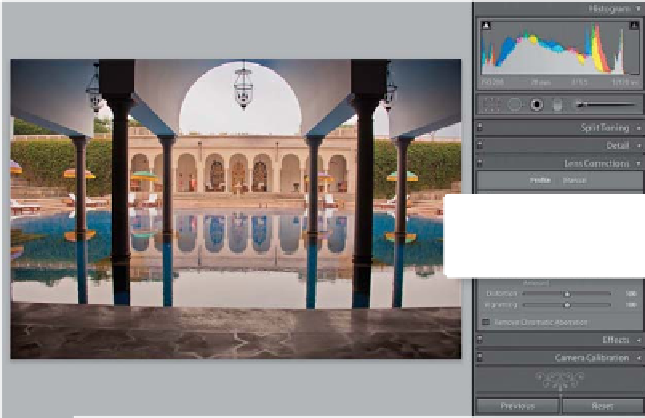
Step Five:
In the Lens Profile section of the panel,
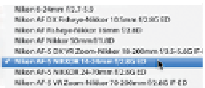
from the Make pop-up menu, choose the
brand of lens you shot with (in this case,
it was a Nikon, so I chose Nikon). Then
choose the type of lens it was shot with
from the Model pop-up menu (this was
shot with a 14-24mm f/2.8 lens, and not
a particularly good one at that).
TIP: If There's No Profile,
Don't Give Up
If Lightroom doesn't have a profile for your
exact lens, try the closest match you can
find. Often, it does a pretty decent job of
fixing the distortion in the image.
Step Six:
While, in this case, there was a profile,
and while it usually works wonders, it
didn't do much more here than remove
a bit of the edge vignetting. If your profile
gets you close, but it's not right on the
money, you can use the two sliders at
the bottom of the panel to tweak the
automatic fix. Here, I tried dragging the
Amount Distortion slider to the right, but
it didn't really do anything (honestly, it
usually works better than it's doing on this
image). If it only helps a little (or none at
all), then click on Manual (at the top of the
panel) to reveal the Transform sliders.