Graphics Programs Reference
In-Depth Information
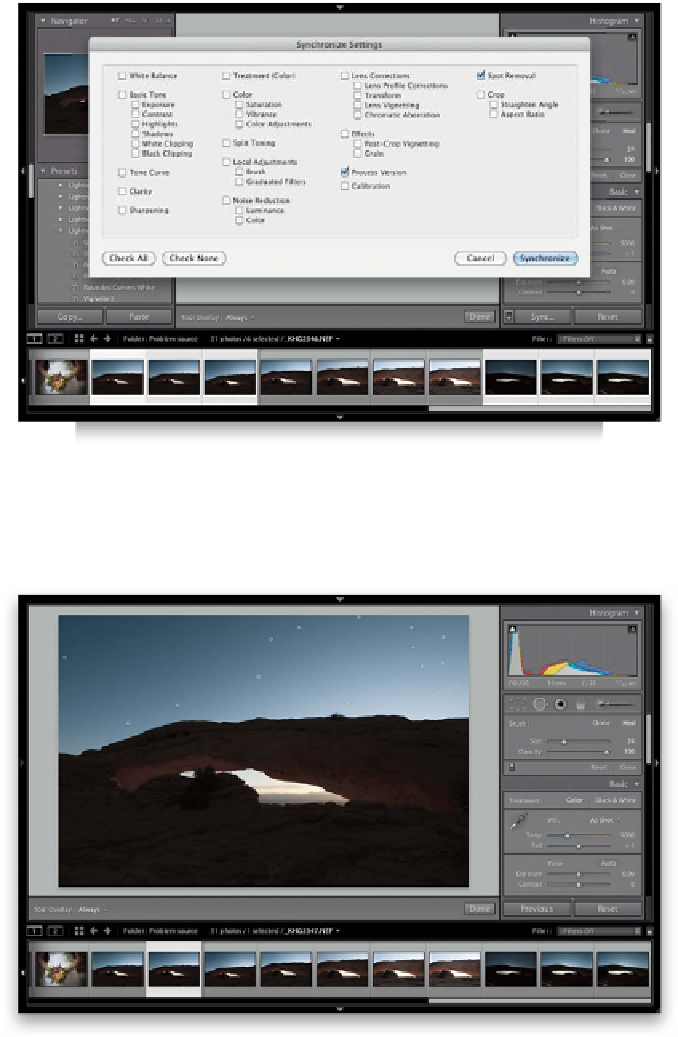
Step Seven:
Back in the first step, I mentioned that the
dust on my camera's sensor created these
annoying spots in the exact same position
in every shot from that shoot. If that's
the case (and with spots like this, it often
is), then once you've removed all the spots,
make sure the photo you fixed is still
selected in the Filmstrip, and select all
the similar photos from that shoot, then
click the Sync button at the bottom of
the right side Panels area. This brings up
the Synchronize Settings dialog, shown
here. First, click the Check None button,
so everything it would sync from your
photo is unchecked. Then, turn on the
checkboxes for Process Version and Spot
Removal (as shown here), and click the
Synchronize button.
Step Eight:
Now, it applies that same spot removal
you did to the first photo, to all these
other selected photos—all at once (as you
can see it did here). To see these fixes ap-
plied, click on the Spot Removal tool again.
I also recommend you take a quick look
at the fixed photos, because depending
on the subject of your other shots, the
fixes could look more obvious than on the
photo you just fixed. If you see a photo
with a spot repair problem, just click on
that particular circle, hit the
Delete (PC:
Backspace) key
on your keyboard to re-
move it, then use the Spot Removal tool
to redo that one spot repair manually.