Graphics Programs Reference
In-Depth Information
When you're searching for any dust spots or specks on your images, it's important
to make sure you don't miss any areas while you're searching around an image
that can easily be 50" wide or more. That's why I fell in love with this trick, which
I learned while reading an interview with Mark Hamburg (known as the “Father
of Photoshop Lightroom”). He mentioned an undocumented feature that helps
ensure that when you're checking an image to remove specks and dust, you
don't miss any areas.
Step One:
Start in the Develop module (that way,
if you do find dust or specks, you can fix
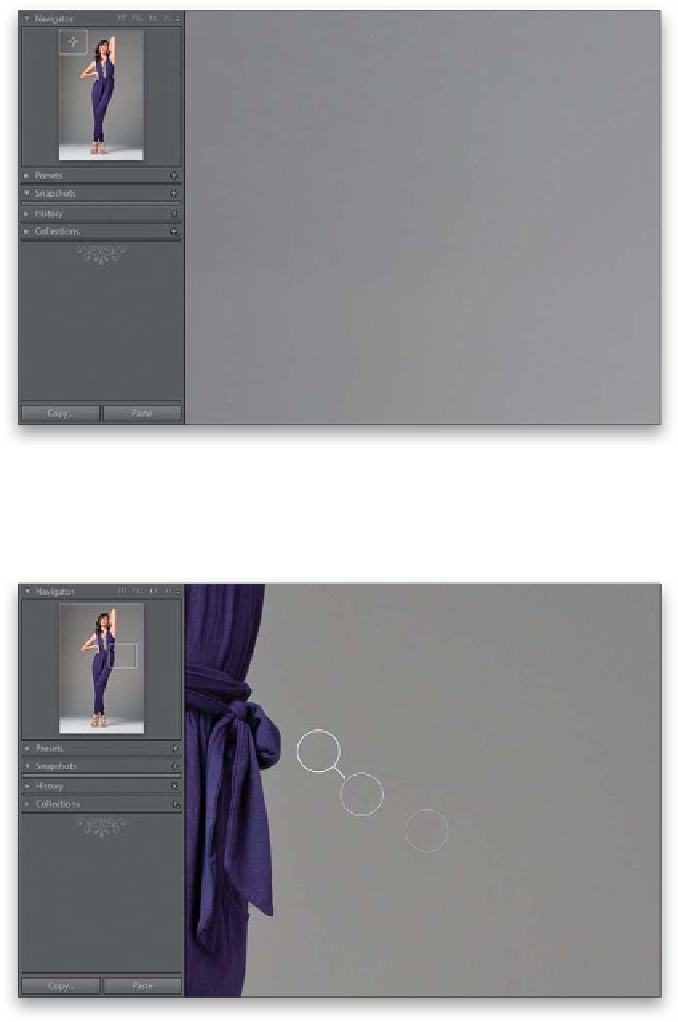
it right there). Now, go to the Navigator
panel (at the top of the left side Panels
area) and click on the 1:1 (100% size) view
(shown circled here in red). If you look in
the panel's small preview window, you'll see
a little square (or rectangle) in the center
of your photo preview, which shows the
area you've zoomed into, and that's what
will be displayed in your center Preview
area, as well. Click on that square, and drag
it to the top-left corner of the Navigator
preview (as shown here).
Step Two:
If you see any spots or dust in this upper-left
corner of your photo, use the Spot Removal
tool to remove them (more on this tool
on the next page). Once you've cleaned up
(“spotted”) that area, press the
Page Down
key
on your keyboard to move straight
down by the exact size of that small white
navigator square. When you've gone all the
way down the far-left side (cleaning as you
go) and you hit the bottom of your image,
it automatically wraps you back up to the
top of the photo, but exactly one column
over, so you can begin “spotting” this area.
If you keep doing this until you reach the
bottom-right corner, you're guaranteed
not to miss any areas.