Graphics Programs Reference
In-Depth Information
Fixing problems that only appear in certain parts of your image is where the Adjust-
ment Brush comes up big, especially so in Lightroom 4. You can now paint noise
reduction (you can apply it just in the shadow areas where most of the noise is visible,
leaving the rest of the photo without any blurring) and white balance (for example,
when part of your image is in daylight and part is in the shade, now it's an easy fix).
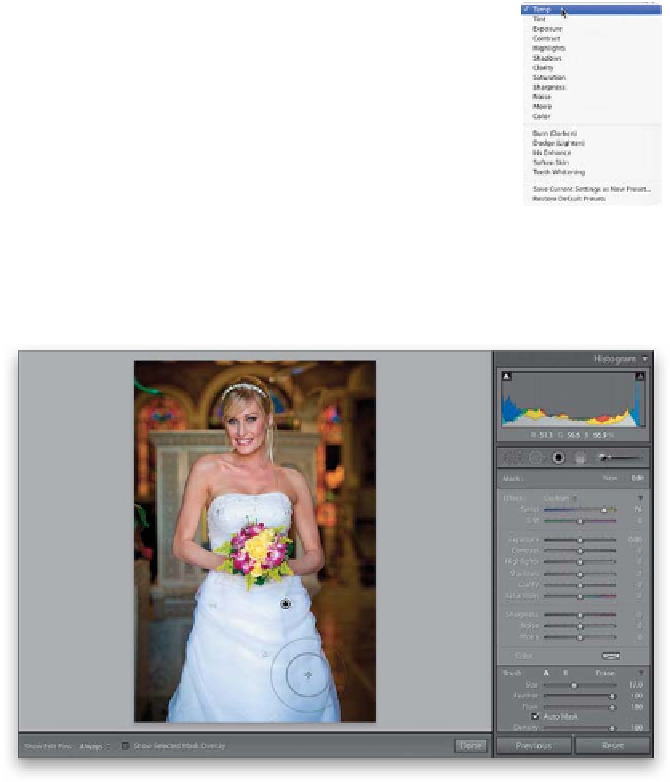
Step One:
Let's start with painting white balance.
Take a look at the image here, where the
bride is shot in the doorway of a church
and her face is lit with natural light. Her
skin tone looks pretty good, because she's
actually in the shade (as far as my camera,
which was set to Auto White Balance, is
concerned), but her white dress has a blue
tint, which we'll need to get rid of. In the
Develop module, click on the Adjustment
Brush in the toolbox near the top of the
right side Panels area (or just press the
letter
K
), and then choose
Temp
(short
for Temperature) from the Effect pop-up
menu (as shown here).
Step Two:
Now, drag the Temp slider way over to
the right and start painting over her dress
(as shown here), and as you do, the yellow
white balance you're painting neutralizes
the blue in her dress, and you wind up with
a white dress (as seen here).