Graphics Programs Reference
In-Depth Information
Step Seven:
Below the Copy as DNG and Copy but-
tons are three handy view options. By
default, it displays all the photos on your
card, but if you shoot to a card, then
download those photos, pop the card
back into the camera, shoot some more,
then download again (which is pretty
common), you can click New Photos,
and now it only shows the photos on
the card that you haven't imported yet,
and hides the rest from view (sweet—
I know). There's also a Destination Folders
view, which hides any photos with the
same name as photos that are already in
the folder you're importing into. These last
two buttons are just there to clear up the
clutter and make it easier for you to see
what's going on as you move files from
one place to another, so you don't have to
use them at all if you don't need them.
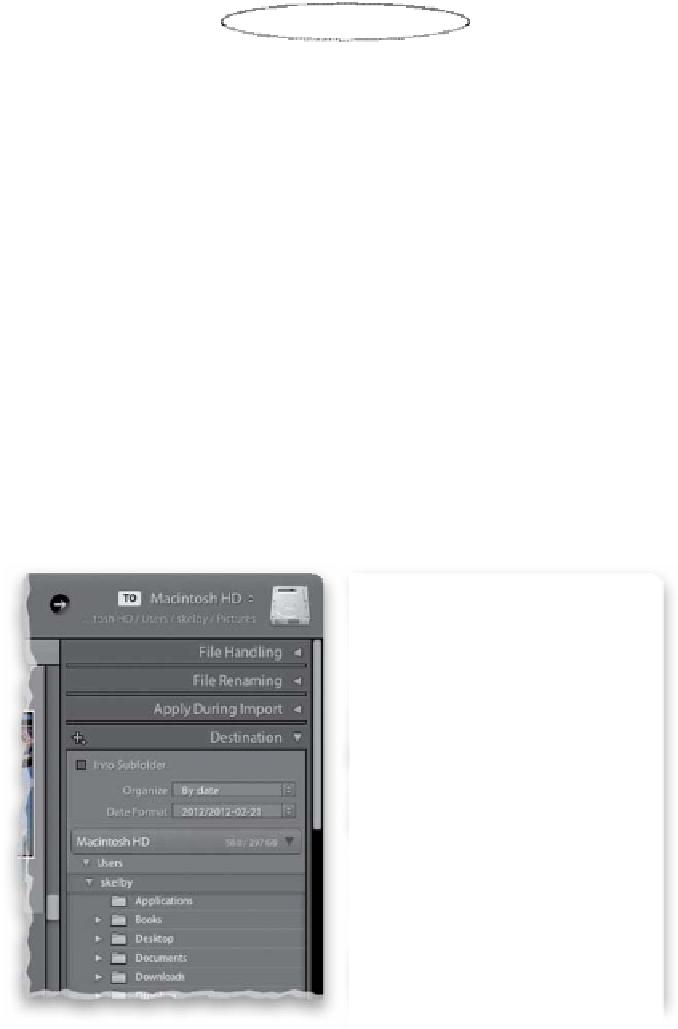
Step Eight:
Now we've come to the part where you
tell Lightroom where to store the photos
you're importing. If you look in the top-
right corner of the window, you'll see the
To section, which shows where they'll 'll
be stored on your computer (in my case
here, on the left, they're going into my
Pictures folder on my hard drive). If you
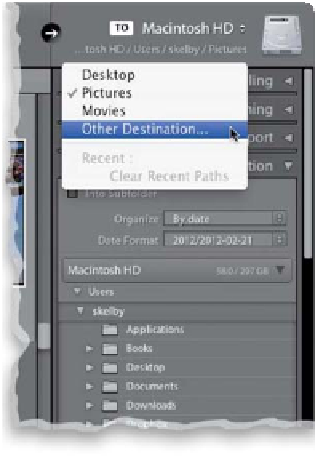
click-and-hold on To, a menu pops up
(as seen far right) that lets you choose
your default Pictures folder, or you can
choose another location, plus you can
choose any recent folders you've saved
into. Whatever you choose, if you look
in the Destination panel below, it now
displays the path to that folder on your
computer, just so you can see where your
photos are going. So now, at this point,
you know three things: (1) the photos
are coming from your memory card;
(2) they're being copied from that card,
not just moved; and (3) they're going into
a folder you just chose in the To section.
So far, so good.