Graphics Programs Reference
In-Depth Information
Lightroom Killer Tips
>
>
▼
Get Different Versions of Photos
Without Making Virtual Copies
▼
Updating Your Presets
If you start your editing by using a De-
velop module User Preset, and you like
the new changes, you can update your
preset by Right-clicking on the old preset
and choosing
Update with Current Set-
tings
from the pop-up menu.
photo from that series, then while it's
selected, also select the underexposed
photos, then go under the Settings menu
and choose
Match Total Exposures
.
It will evaluate the overall exposure from
Think of snapshots as another way to
have one-click access to multiple versions
of your photo. When you're working in
the Develop module and see a version
of your photo you like, just press
Com-
mand-N (PC: Ctrl-N)
and how your
photo looks at that moment is saved to
your Snapshots panel (you just have to
give it a name). So, that way, you could
have a B&W version as a snapshot, one
version as a duotone, one version in
color, one with an effect, and see any
of those in one click, without having
to scroll through the History panel to
try to figure out where each look is.
your “most-selected” photo (your prop-
erly exposed photo) and use that to fix
the underexposed photos.
▼
Getting a Film Grain Look
If you want to simulate the look of film
grain, there's a feature that does just
that in the Effects panel (to really see the
grain, you'll first want to zoom in to a
100% [1:1] view). The higher you drag the
Grain Amount, the more grain is added
to your photo (I don't generally go over
40 as a maximum, and I usually try to stay
between 15 and 30). The Size slider lets
you choose how large the grain appears (I
think it looks more realistic at a fairly small
size) and the Roughness slider lets you
vary the consistency of the grain (the far-
ther to the right you drag the Roughness
slider, the more it's varied). Lastly, Grain
tends to disappear a bit when you make a
print, so while the amount may look right
onscreen, don't be surprised if it's barely
visible in print. So, if your final output is
print, you might have to use a little more
grain than you think you should.
▼
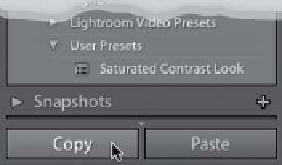
Copy What You Last Copied
▼
Create White Balance Presets
for JPEG and TIFF Images
I mentioned in Chapter 5 that with JPEG
or TIFF images the only White Balance
preset available to you is Auto. However,
here's a cool workaround to get you more
choices: Open a RAW image and only
make one edit—choose the White Bal-
ance preset Daylight. Now, save just that
change as a preset and name it White
Balance Daylight. Then do that for each
of the White Balance presets, and save
them as presets. When you now open
a JPEG or TIFF image, you'll have these
one-click White Balance presets you
can use to get a similar look.
When you click the Copy button in the
Develop module (at the bottom of the
left side Panels area), it brings up a Copy
Settings dialog asking which edits you
want to copy. However, if you know
you want to copy the same edits as you
had previously (maybe you always copy
everything), then you can skip having that
Copy Settings dialog pop up completely
by pressing-and-holding the Option (PC:
Alt) key, then clicking the Copy button (it
will change from Copy… to Copy).
▼
Fix Underexposed Photos
Fast with Match Exposure
If you see a series of photos of the same
subject, and some of these photos are
underexposed, try this quick trick to fix
those fast: Click on a properly exposed
▼
Make It Easier to Choose
Camera Profiles
To make things easier when choos ing
your Camera Calibration panel pro-
files, try this: Set your DSLR to shoot