Graphics Programs Reference
In-Depth Information
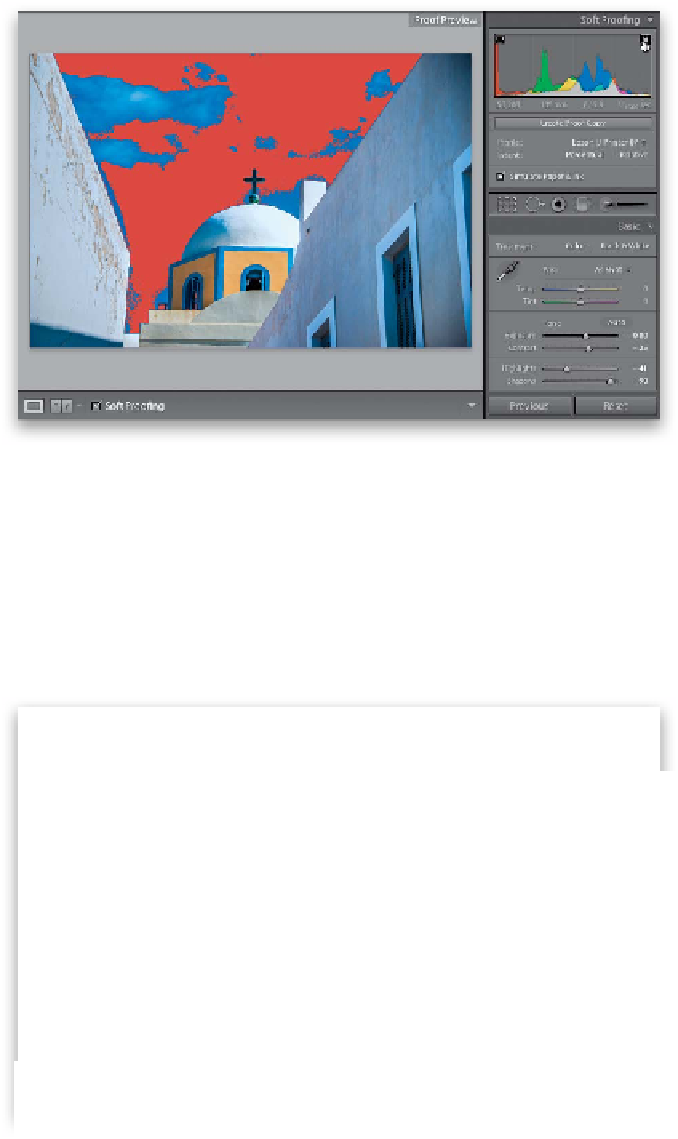
Step Three:
Now that you're in Soft Proofing mode,
how do you know if some colors in your
image are going to be printable (colors
that can't be printed by your printer are
technically called “out-of-gamut” colors)?
Well, if you look up at the histogram, there
are icons in the upper corners. The one on
the right looks like a curled page (that's the
print gamut warning), and if you click on
it, it highlights in red any areas that are too
vibrant to be printed by your printer (these
are the colors that are out of gamut). Here,
you can see a lot of the rich blue colors
in the sky are outside what my printer
can print. You choose your printer profile
from the Profile pop-up menu below the
histogram or you can choose Adobe RGB
(Adobe's recommended color space for
printing, which you'd use if you don't have
a printer profile installed. See Chapter 13
for more on printer profiles). By the way,
the icon in the top left of the histogram
(which looks like a monitor) is the web
gamut warning, and we'll talk about this
a little more in a minute.
Step Four:
Okay, so we see we have a problem in the
sky. We can do one of three things: (1) We
can desaturate the entire image by lower-
ing the Vibrance in the Basic panel, but
that will make all the colors in the image
desaturated (not a good choice). What I'd
do instead is (2) use the Adjustment Brush
to desaturate just those colors in the sky
that are out of gamut. So, click on the
Adjustment Brush (below the Soft Proofing
panel; shown circled here), double-click on
the word “Effect” to reset all the sliders
to 0, then drag the Saturation slider to the
left (I dragged it over to -25 here). As soon
as you do this, a dialog will appear asking
if you want to make a virtual copy (a soft
proof) of the image first (I sure would—
that way the original stays untouched).
Now, start painting over the sky. If the red
out-of-gamut warning goes away as you
paint, you've desaturated enough.
Continued