Graphics Programs Reference
In-Depth Information
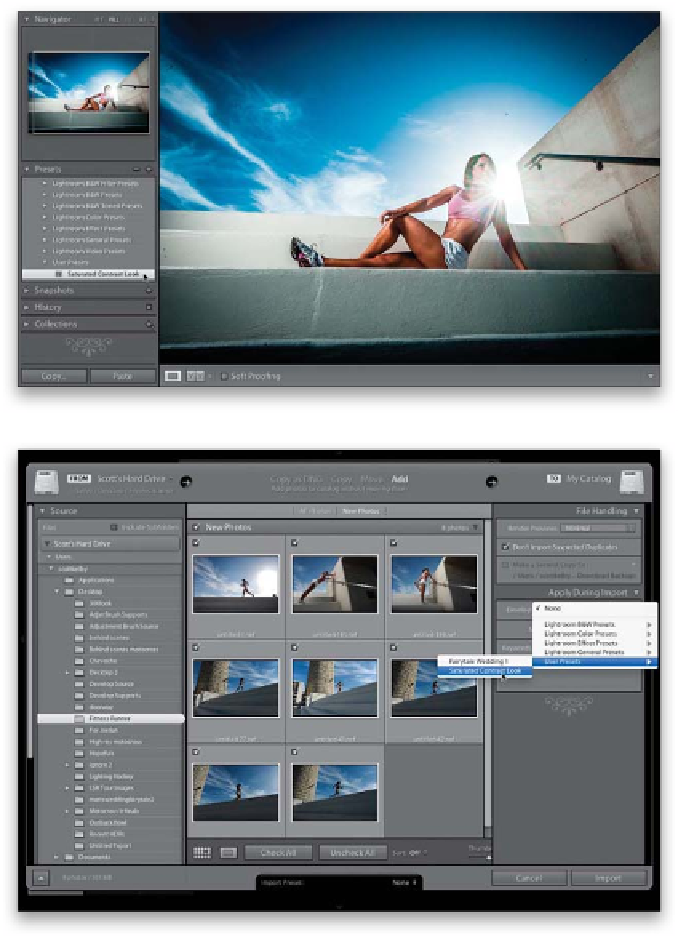
Step Seven:
Now click on a different photo in the Film-
strip, then hover your cursor over your new
preset (I'm hovering over my Saturated
Contrast Look preset). Look up at the Navi-
gator panel, and you'll see a preview of the
preset (as seen here, where you're seeing
what the current color photo would look
like if you applied the custom preset we
just made). Seeing these instant live pre-
views is a huge time saver, because you'll
know in a split second whether your photo
will look good with the preset applied or
not, before you actually apply it.
Step Eight:
You can even put these presets (the built-
in ones that come with Lightroom, and
the ones you create yourself) to use from
right within the Import window. For ex-
ample, if you knew you wanted to apply
the Saturated Contrast Look preset to a
group of photos you were about to import,
inside the Import window, over in the Apply
During Import panel, you'd choose this pre-
set from the Develop Settings pop-up menu
(as shown here), and that preset would
automatically be applied to each photo
as it's imported. There's one more place
you can apply these Develop presets, and
that's in the Saved Preset pop-up menu,
at the top of the Quick Develop panel, in
the Library module (more about the Quick
Develop panel on the next page).
TIP: Importing Presets
There are lots of places online where you
can download free Develop module presets
(like from this book's companion website
[see Chapter 14] and from my buddy, Matt
Kloskowski's LightroomKillerTips.com).
Once you've downloaded some, to get
them into Lightroom, go to the Presets
panel, then Right-click on User Presets, and
choose
Import
from the pop-up menu.
Locate the preset you downloaded and click
the Import button, and that preset will now
appear in your User Presets list.