Graphics Programs Reference
In-Depth Information
Step Three:
If you're shooting landscapes (and you
want that Fuji Velvia film look), or you just
have a subject where you really want vivid
colors, try the Camera Vivid profile, which
mimics the Vivid color preset you could
have chosen in your camera. I love this one
for landscapes, but I'll also try the Camera
Landscape profile and compare the two,
to see which one looks best for the par-
ticular photo I'm looking at, because I've
learned that it really depends on the photo
as to which profile looks best. That's why
I recommend trying a few different profiles
to find the one that's right for the photo
you're working with.
Note:
Don't forget, you
only get a choice of these camera profiles if
you shot in RAW. If you shot in JPEG mode,
you'll only see one profile: Embedded.
TIP: Create Your Own Profiles
You can create your own custom prof iles
using Adobe's free DNG Profile Editor,
available from Adobe at
http://labs.adobe
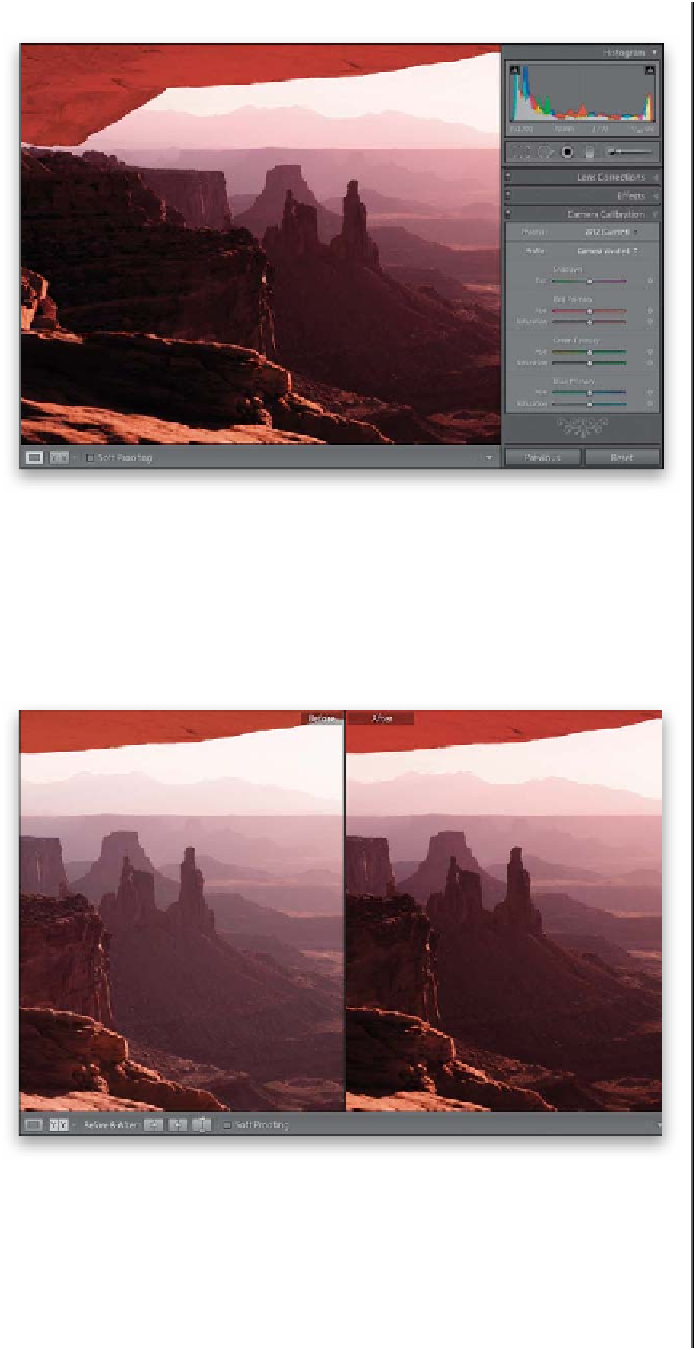
Step Four:
Here's a before/after, where the only thing
I did was choose the Camera Vivid profile.
By the way, Adobe doesn't claim that these
profiles will give you the look of a JPEG
image, but in my opinion, they surely can
get you fairly close. I use these profiles
anytime I want my starting point to be
closer to the JPEG-like image I saw on
the back of my camera.
TIP: Apply Profiles Automatically
If you find that you like a particular profile,
and you always want it applied to your
RAW images, you can go to the Develop
module, choose the profile (don't do any-
thing else in the Develop module), and
create a Develop preset with that name.
Now, you can apply that look automatically
to every photo you import by choosing that
preset from the Develop Settings pop-up
menu in Lightroom's Import window. (For
more on creating presets, see page 196.)