Graphics Programs Reference
In-Depth Information
Anytime you have just one color you want to adjust in an image (for example, let's
say you want all the reds to be redder, or the blue in the sky to be bluer, or you
want to change a color altogether), one place to do that would be in the HSL panel
(HSL stands for Hue, Saturation, Luminance). This panel is incredible handy (I use it
fairly often) and luckily, because it has a TAT (Targeted Adjustment tool), using it is
really easy. Here's how this works:
Colors Using HSL
Step One:
When you want to adjust an area of color,
scroll down to the HSL panel in the right
side Panels area (by the way, those words in
the panel header, HSL/Color/B&W, are not
just names, they're buttons, and if you click
on any one of them, the controls for that
panel will appear). Go ahead and click on
HSL (since this is where we'll be working for
now), and four buttons appear in the panel:
Hue, Saturation, Luminance, and All. The
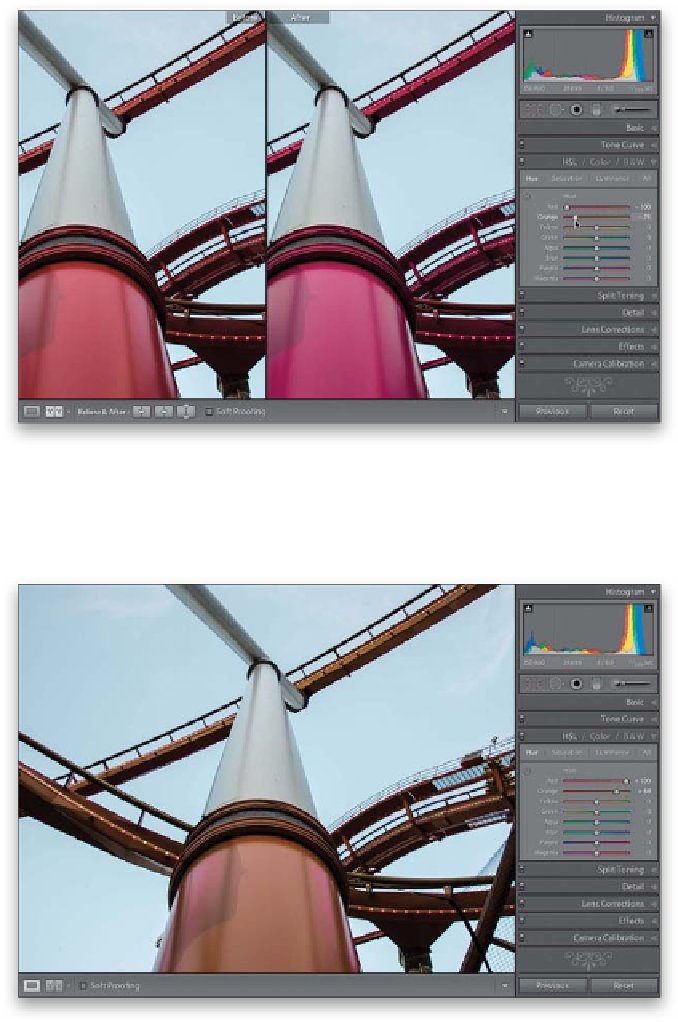
Hue panel lets you change an existing color
to a different color by using the sliders. Just
so you can see what it does, click-and-drag
the Red slider all the way to the left and
the Orange slider to -71, and you'll see it
changes the red roller coaster support pole
to magenta. Now press the Reset button
(at the bottom of the Panels area) to undo
your change.
Step Two:
If you dragged those two sliders in the
opposite direction, it would change the
color on the red pole to more of an orange-
ish color (did you notice it didn't just affect
the pole? Since the track was also red, it
changed all the track to orange). This is
a perfect task for the Hue sliders of the
HSL panel. Now, what if you wanted to make
the orange color more orange, but you've
pushed the sliders just about as far as they
can go? Well, you'd start by clicking on the
word “Saturation” at the top of the panel.