Graphics Programs Reference
In-Depth Information
I always start editing my photos by setting the white balance first, because if
you get the white balance right, the color is right, and your color correction
problems pretty much go away. You adjust the white balance in the Basic
panel, which is the most misnamed panel in Lightroom. It should be called
the “Essentials” panel, because it contains the most important, and the
most used, controls in the entire Develop module.
Setting the
Step One:
In the Library module, click on the photo
you want to edit, and then press the letter
D
on your keyboard to jump over to the
Develop module. By the way, you're prob-
ably figuring that since you press D for the
Develop module, it must be S for Slide-
show, P for Print, W for Web, etc., right?
Sadly, no—that would make things too
easy. Nope, it's just Develop that uses the
first letter. (Arrrrgggh!) Anyway, once you're
in the Develop module, all the editing con-
trols are in the right side Panels area, and
the photo is displayed using whatever you
had the white balance set on in your digital
camera (called “As Shot”).
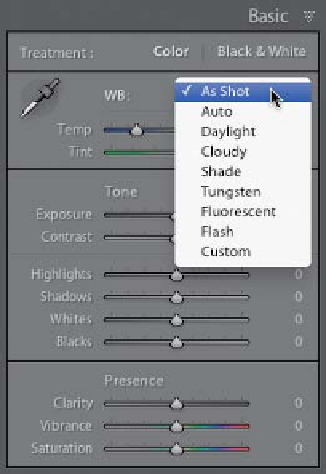
Step Two:
The white balance controls are near the
top of the Basic panel, and there you'll see
a White Balance (WB) pop-up menu where
you can choose the same white balance pre-
sets you could have chosen in your camera,
as seen here.
(Note:
The one big difference
between processing JPEG and TIFF images,
and those shot in RAW, is that you only get
this full list of presets if you shoot in RAW.
If you shoot in JPEG, you only get one preset
choice—Auto—and that's it.)