Graphics Programs Reference
In-Depth Information
2.
Choose the Quick Select tool and select Auto-Enhance on the options
bar if it is not already selected. Drag over the woman to select her.
Hold down Opt and drag over anything selected that is not part of her
body or clothing.
3.
Press Shift+Cmd+I to select the inverse (everything but the woman).
4.
Click the Black & White icon in the Create panel. The current
selection automatically becomes a layer mask on a Black & White
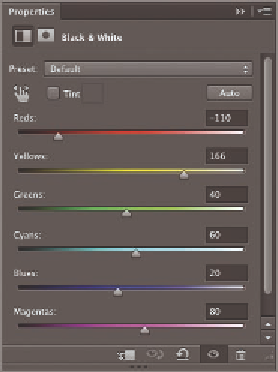
adjustment layer. Drag the Reds slider to -110 and the Yellows slider
to +166 (see Figure 15.22).
Cmd+click the “not
woman” channel to
load it as a selection
if you are having
trouble getting a
clean selection.
FIGURe 15.22
Adjusting the
grayscale values of reds and yellows
in the color image
5.
Select the woman's white coat with Quick Select. Again, hold down
Opt and remove any areas you unintentionally select. Use any of the
selection techniques you learned in Chapter 7 to refine the selection
so that only her coat is selected and not her hands, face, or hair (see
Figure 15.23).
Cmd+click the coat
channel to load it
as a selection if you
are having trouble
getting a clean
selection.
6.
Click the Hue/Saturation icon in the Create panel. In the Properties
panel, select Colorize. Drag the Saturation slider to 51 and the Lightness
slider to -62. If you wanted to change the hue, it would be as simple as
dragging the Hue slider, but in this case I like red (see Figure 15.24).
7.
Save your work as
Woman-adjusted.psd
. Figure 15.25 shows the
result.