Hardware Reference
In-Depth Information
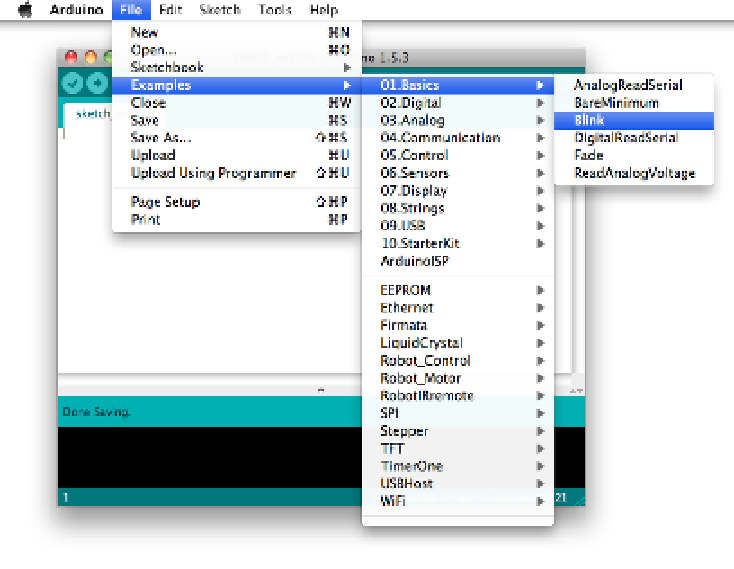
1. Within the IDE, click File
→
Examples
→
01.Basics
→
Blink. See
Figure 2-7
.
2. A new sketch window will open up with some code in it.
3. Click the Upload button on the tool bar.
4. It may take a moment to compile and upload to the board. You'll see text
go by in the console at the bottom of the window.
5. When it's done, you'll see the text “Done uploading” at the bottom.
Figure 2-7.
Navigating through the examples menu to open the Blink
example
While you were waiting for “Done uploading” to appear, the Arduino IDE
compiled
the sketch, which means it turned the code into instructions that
Galileo's processor will understand. The IDE then uploaded the compiled
program to the board.
Now when you look at the board, you should see an LED blinking on and off
right next to the clock battery connector (see
Figure 2-8
). If not, you'll want
to troubleshoot this before moving forward. Here are a few troubleshooting
steps:

