Database Reference
In-Depth Information
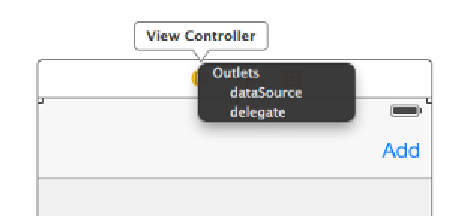
Before you can do that, you need to make the view controller the table view's data
source. Ctrl-drag from the table view to the yellow view controller icon above the
navigation bar, as shown below, and click on
dataSource
:
In case you were wondering, you don't need to set up the table view's delegate
since tapping on the cells won't trigger any action. It doesn't get simpler than this!
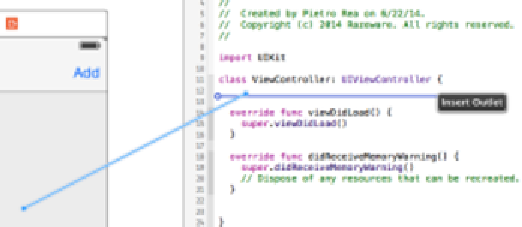
Open the Assistant Editor by hitting Command-Option-Enter or by selecting the
middle button on the Editor toolset on the Xcode bar. Ctrl-drag from the table view
onto
ViewController.swift
, inside the class definition to insert an outlet:
Name the new
IBOutlet
property
tableView
, resulting in the following line:
@IBOutlet weak
var
tableView:
UITableView!
Ctrl-drag from the
Add
bar button item onto
ViewController.swift
, but this time,
create an action instead of an outlet and name the method
addName
:
@IBAction
func
addName(sender:
AnyObject
) {
}
You can now refer to the table view and the bar button item's action in code. Next,
set up the model for the table view. Add the following property to
ViewController.swift
:
//Insert below the tableView IBOutlet
var
names = [
String
]()
names
is a mutable
Array
to hold the strings for the table view to display.