Graphics Programs Reference
In-Depth Information
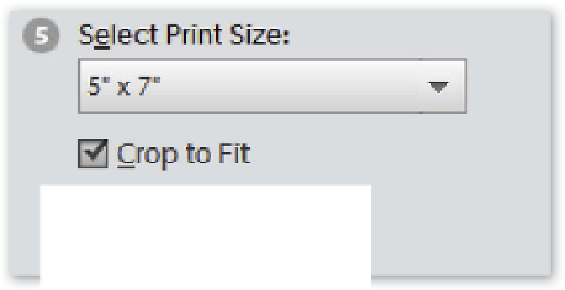
If the photo is not the same shape as the Print Size you have selected, then the image will be
resized to fit within the frame. This may mean that you will have some white space on the
left or right of the photo, or top and bottom. If you want the blue frame filled totally with the
photo, even if this means that the some parts of the picture will be cropped in the process,
then select the Crop to Fit option just below the print size menu.
The Custom setting on the Print Size
menu allows you to create photos on a
specific size on the background.
Creating a Custom Print Size
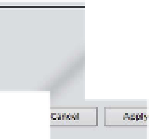
Choosing the Custom entry from the Print Size menu displays a More Options dialog. Here
you can enter specific dimensions and format for a set Print Size. Clicking the OK button will
close the dialog and redraw the print preview in the new Print Size. Clicking the Apply but-
ton will redraw the preview with the new print size but keep the More Options dialog open.
This allows you to try a few different size and format combinations before pressing the OK
button.
Additional dialog options
The five key controls listed above contain the majority of the settings that you will use for
many print jobs. Elsewhere throughout the dialog are other options, menus and settings for
further printing refinement. They include:
The Print copies setting
controls the number of
copies of the photo which
are printed.
Print copies
- The Print Copies setting is locat-
ed at the bottom of the Print Size section on the
right of the dialog. Here you can set the number
of copies of the print that you are instructing the
printer to create. By default this option is set to 1
but can be easily changed with the up and down
arrows.
Help
- The Help button links through to the
Printing section of the Elements' help system.


Search WWH ::

Custom Search