Graphics Programs Reference
In-Depth Information
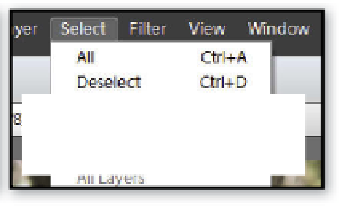
Transforming selections
Most readers will be familiar with the Free Transform feature that we use to manipulate the
size and shape of picture and layer content. A similar feature is available for changing the
size and shape of active selections.
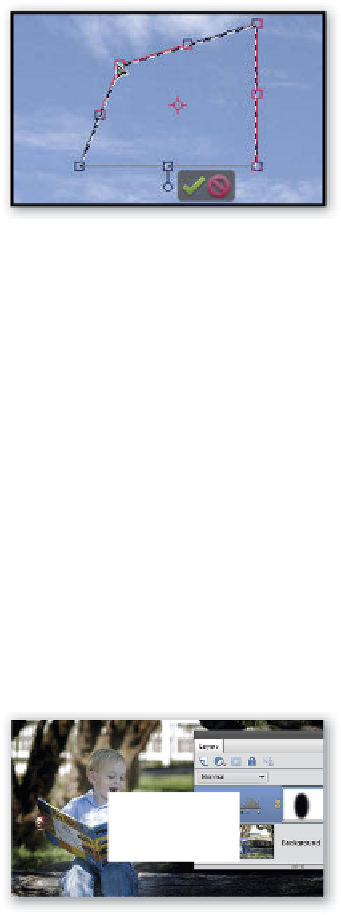
Step-by-step selection transformation:
Follow this three-step process to transform your selections.
1
2
3
Create the Selection:
Start by creating the selection using any of
the tools available in Photoshop Elements.
Transform the Selection:
With the selection still active, the Transform
Selection option will be available on the Se-
lect Menu. Selecting this option will place
handles in the corners and sides of the selec-
tion allowing the user to manipulate the size
and shape of the selection without altering
the image beneath.
Make Changes:
Dragging any of the handles will alter the
shape and size of the selection. Holding
down the Shift key will maintain the aspect
ratio of the selection. Using the Alt/Opt key
will adjust the selection from the center rath-
er than the edges and using the Ctrl/Cmd key
will allow the user to distort the selection.
Click Enter or press the green tick button to
apply the transformation.
Inverting selections
The Select > Inverse command makes a new selection by choosing all the pixels in the pic-
ture that are currently not selected. When trying to select a subject that has a complex edge
but a plain background, it can be quicker to select the background first with a tool such as
the Magic Wand and then swap the selection from the background to the foreground using
the Select > Inverse option.
Step-by-step inverting a selection:
Follow these steps to swap selected and non-select parts of the photo.
1
2
3
Create Initial Selection:
Sometimes it is faster to select the part of
the photo that you don't want first and then
use this as the basis for creating a selection
of the subject. A classic example is when you
are wanting to create a vignette around a
subject. It is quicker to select the subject with
the Elliptical Marquee first.
Invert the Selection:
The next step is to flip the selection so that
instead of isolating the subject the selection
is around the outside of the photo. We do
this by choosing Select > Inverse.
Apply Adjustment via Selection:
To complete the vignette effect, we will soft-
en the edges of the selection via the Feather
slider control in the Refine Edge dialog. With
the selection still active apply the
vignette with a new Levels Adjustment layer.
Just push the mid tone and white point slid-
ers to the left to lighten the selected area.


Search WWH ::

Custom Search