Graphics Programs Reference
In-Depth Information
The Smart Brush tool
One of the major changes introduced in Photoshop Elements
7.0 was the ability to select and make changes with the one
tool. The Smart Brush tool brings a whole new level of ease
to the process of changing specific areas of your photo. By
combining the selecting abilities of the Quick Selection tool and the enhancement options
available via adjustment layers, the Adobe engineers have created a new way to change the
look of your photos. And in version 10 Adobe included a bunch of presets you can use with
both the Smart Brush and Detail Smart Brush tools
Unlike the traditional way of applying adjustments where the user must first make a selec-
tion and then apply the adjustment, the Smart Brush Tool creates the selection and applies
the adjustment as the user paints over the image. You can select the type of adjustment that
will be applied with the tool from a list of over 65 that ships with Elements.
These presets are grouped under general headings in the Preset Chooser located in the op-
tions bar. Here you will find options for altering image characteristics such as color, tone
and saturation as well as subject-based enhancements such as brightening teeth or making
a dull sky bluer and, of course, a bunch of special effects changes.
Preset entries can be displayed in a list or thumbnail form by selecting one of the options
displayed when pressing the double sideways arrows in the top left of the Presets window.
The Smart Brush Tool is only available in Full editor workspace.
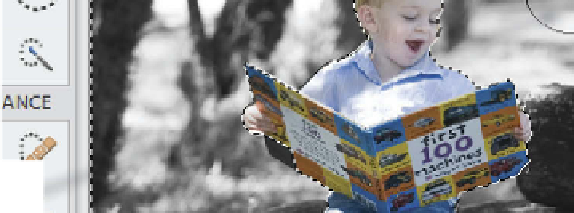
After selecting the
enhancement type, (here
I used one of the convert
to black and white
options), all you need to
do is paint over the parts
of the photo that you
want to change. If the
tool selects too much of
the photo, switch to the
Subtract from Selection
mode (hold down the
Alt/Opt key) and paint
over the unwanted
change to remove it.


Search WWH ::

Custom Search