Graphics Programs Reference
In-Depth Information
Organizer to Editor
There are two different ways to move files from the Organizer space to the Editor.
1.
Choose the Edit with Photoshop Elements Editor entry from the menu that pops up
when you right click a thumbnail in Organizer.
2.
After selecting the photo in the Organizer work space, pick Photo Editor from the
pop-up menu that is displayed when clicking the Editor button on the taskbar at the
bottom of the workspace.
Editor to Organizer
Working in the reverse direction it is important that any files that you create or enhance in
the Editor space are added to, or updated in, the Organizer catalog. Thankfully this scenario
is well handled in Elements with the following options being available:
Choosing the Include in
the Elements Organizer
option in the Save dialog
will ensure that your ad-
justed images are added
to the Organizer catalog.
1.
For newly-created images, photos opened directly into the Editor (File > Open) or
pictures selected in the Organizer, simply make sure that the Include in Organizer
setting in the Save Options of the Save dialog is checked when saving your adjust-
ment changes.
2.
Any auto-enhancements applied via the Fix pane features in the Organizer space
will automatically add the altered photo as an extra entry in a version set in the
Organizer.
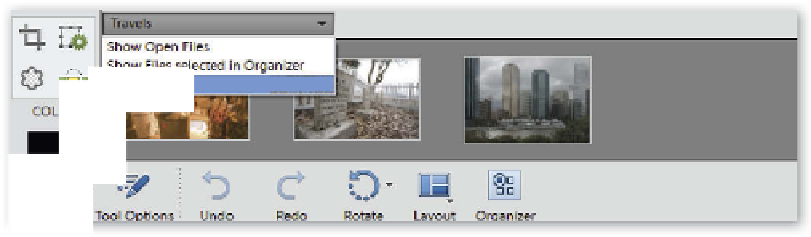
A small version of the Organizer inside the Editor - Introducing the Photo Bin
The Photo Bin (previously called the Project Bin), which sits at the bottom of the Editor
workspace, not only serves as a place to store images when they are being enhanced, but the
feature can also act as a window to the files stored in the Organizer. Albums in the Organiz-
The Photo Bin provides
two-way interaction be-
tween the Organizer
workspace and the Editor.
Here you can see the con-
tents of an Album created
in the Organizer displayed
in the Editor.


Search WWH ::

Custom Search