Graphics Programs Reference
In-Depth Information
#
1
2
Too much Dust & Scratches
filtering can destroy image
detail and make the pic-
ture fuzzy.
(1) Original picture.
(2) Photo after too much
Dust & Scratches filtration.
this filter are critical if you are to maintain image sharpness whilst removing small marks.
Too much filtering and your image will appear blurred, too little and the marks will remain.
To find settings that provide a good balance, first try adjusting the Threshold setting to zero.
Next, use the Preview box in the Filter dialog to highlight a mark that you want to remove.
Use the zoom controls to enlarge the view of the defect. Now drag the Radius slider to the
right. Find, and set, the lowest Radius value where the mark is removed. Next, increase the
Threshold value gradually until the texture of the image is restored and the defect is still
removed.
Dust & Scratches workflow:
1 Select Filter > Noise > Dust & Scratches.
2 Move preview area to highlight a mark to be removed.
3 Zoom the preview to enlarge the view of the mark.
4 Ensure that the Threshold value is set to zero.
5 Adjust the Radius slider until the mark disappears.
6 Adjust Threshold until texture returns and the mark is still not visible.
7 Click OK to finish.
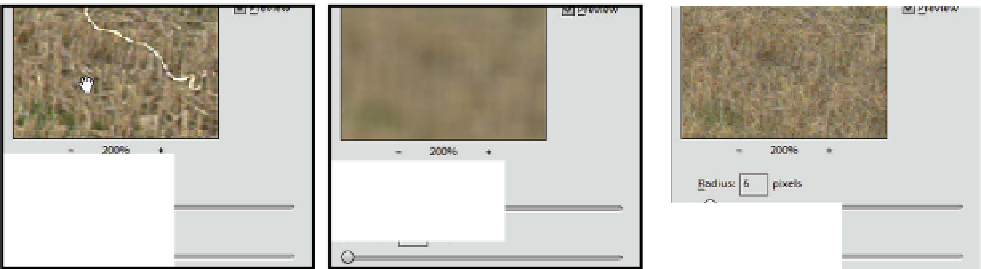
Step-by-step Dust & Scratches application:
Follow the three-step process to ensure that you choose the optimal settings for the Dust & Scratches filter.
1
2
3
Set both sliders to minimum (all the way to
the left). Preview the Dust Mark area.
Adjust the Radius slider until the mark
disappears.
Raise the Threshold slider to regain texture
in the non-marked area of the image.
Raise the Threshold slide


Search WWH ::

Custom Search