Graphics Programs Reference
In-Depth Information
#
Adobe recognized that a lot of small modern digital cameras have flashguns close to their
lens - the major cause of this problem - and developed a specialist tool to help retouch these
images. Called the Red Eye Removal tool since version 3.0 and the Red Eye Brush in previ-
ous releases, it changes the crimson color in the center of the eye to a more natural-looking
black.
EXPERT
To correct the problem is a simple process that involves selecting the tool and then clicking
on the red section of the eye. Elements locates the red color and quickly converts it to a more
natural dark gray. The tool's options bar provides settings to adjust the pupil's size and the
amount that it is darkened. Try the default settings first and if the results are not quite per-
fect, undo the changes and adjust the option's settings before reapplying the tool.
Red Eye Removal workflow:
1 Select the Red Eye Removal tool from the toolbox.
2 Click on the red area of the eye or drag a marquee around the eye to apply the color
change.
3 If the results are not perfect, Edit > Undo the changes and adjust the Pupil Size and
Darken Amount settings in the options bar. Click on the red area to reapply the
color change.
The Red Eye Removal tool is available in both the Quick Fix and Full editing workspaces.
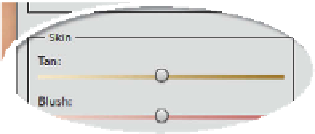
The Adjust Color for Skin Tones
feature cleverly corrects the col-
or of skin tones that contain a
cast.


Search WWH ::

Custom Search