Graphics Programs Reference
In-Depth Information
#
G
G
G
G
G
GUIDED
G
G
G
G
G
G
GU
I
I
I
I
I
I
I
I
I
I
I
I
I
I
I
I
I
I
I
I
I
I
I
I
I
I
I
I
ID
E
E
E
E
E
E
E
E
E
E
E
E
E
E
E
E
E
E
E
E
E
E
E
E
E
E
E
E
E
E
E
E
E
E
E
E
E
ED
Tools
Open
image
Before
preview
Photo
Bin
After
preview
Before
and after
Activity
steps
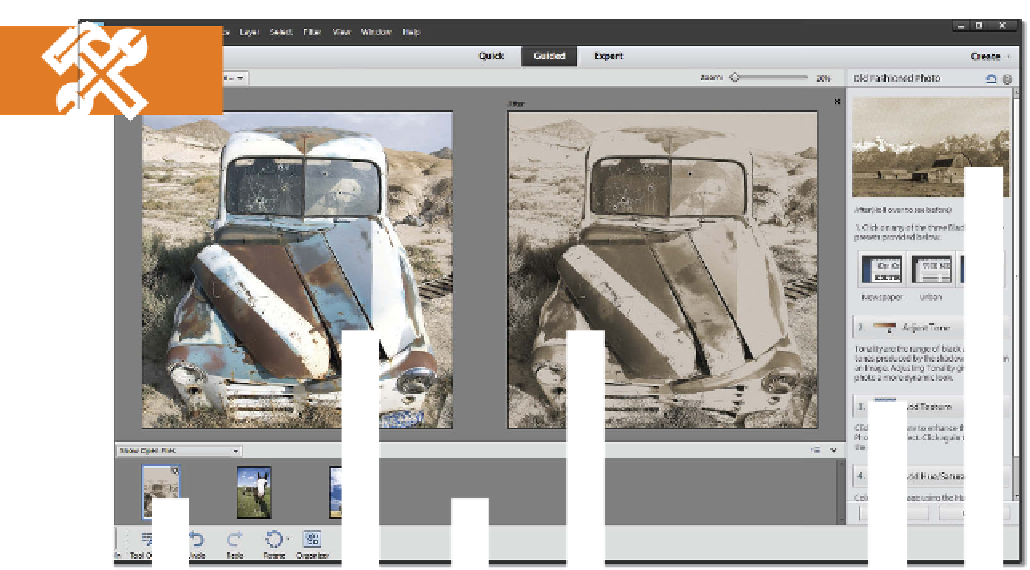
The Guided Edit mode has
its own workspace com-
plete with preview area,
small toolbar on the left
and dedicated step-by-
step pane on the right.
The Guided editor mode can be found in the Edit Task Pane of both the Macintosh and Win-
dows versions of Photoshop Elements. The mode has its own workspace with a very simple
tool bar containing several tools depending on the activity you are undertaking, a preview
area displayed in the middle of the screen and a series of step-by-step instructions in the ded-
icated Guided edit task pane on the right. The pane includes a list of activity groupings such
as 'Touch Ups' and 'Photo Play' with a series of activity entries listed under each heading.
Unlike other edit spaces in Elements, the Guided Edit mode groups together the tools needed
to perform the chosen activity with clear and detailed instructions about the best way to use
these tools. It is a bit like having your own tutor right in the program.
For instance, if you wanted to know how to create an old-world-looking version of your
photo, like the example above, then just select the Old Fashion Photo entry listed under the
Photo Effects heading in the Guided edit task pane. The pane's display changes to show a
series of steps, instructions, a Before and After example and several buttons to produce the
effect.
With many Guided Edit entries the various tools and controls needed to complete the tech-
nique are also included in the pane and are positioned within the tutorial steps where and
when you need them. This set up makes using features like the Recompose Tool a cinch as


Search WWH ::

Custom Search