Graphics Programs Reference
In-Depth Information
Okay, now that we have a good understanding of the features and controls within the Adobe
Camera Raw dialog let's move on and look at a typical conversion workflow.
1
2
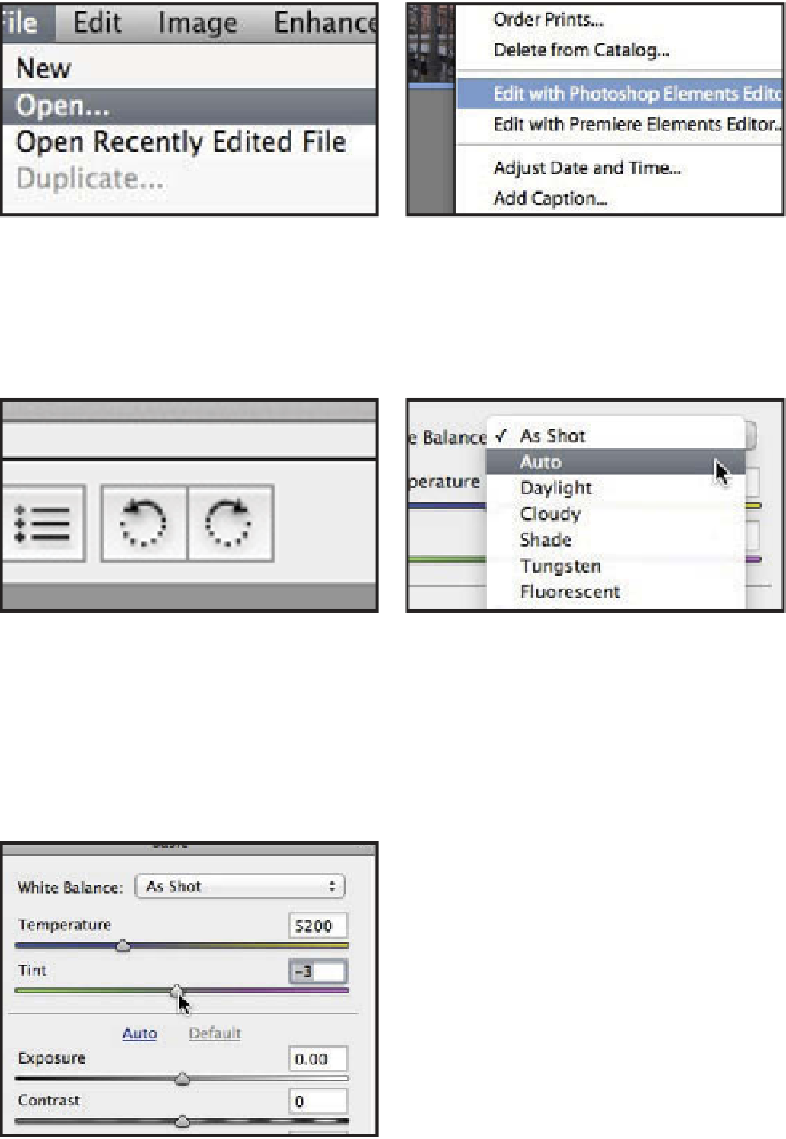
Opening the raw file in the Editor workspace:
Once you have downloaded your raw files from camera
to computer you can start the task of processing. Keep
in mind that in its present state the raw file is not in
the full color RGB format that we are used to, so the
first part of all processing is to open the picture into
Adobe Camera Raw. Selecting File > Open from inside
Elements will automatically display the photo in this.
Starting with the Organizer:
Starting in the
PhotoBrowser or Organizer workspace simply right-
click on the thumbnail of the raw file and select Edit
with Photoshop Elements from the pop-up menu to
transfer the file to the Elements version of ACR in the
Editor workspace.
3
4
Rotate right or left:
Once the raw photo is open in
ACR you can rotate the image using either of the two
Rotate buttons at the top of the dialog. If you are the
lucky owner of a recent camera model then chances
are the picture will automatically rotate to its correct
orientation. This is thanks to a small piece of metadata
supplied by the camera and stored in the picture file
that indicates which way is up.
Preset changes:
A s we have seen you can opt to stay
with the settings used at the time of shooting ('As
Shot') or select from a range of light-source-specific
settings in the White Balance drop-down menu of
ACR. For best results, try to match the setting used
with the type of lighting that was present in the scene
at the time of capture. Or choose the Auto option from
the drop-down White Balance menu to get ACR to
determine a setting based on the individual image
currently displayed.
5
Manual adjustments:
If none of the preset white
balance options perfectly matches the lighting in
your photo then you will need to fine-tune your
results with the Temperature and Tint sliders
(located just below the Presets drop-down menu).
The Temperature slider settings equate to the color
of light in degrees Kelvin - so daylight will be 5500
and tungsten light 2800. It is a blue to yellow scale,
so moving the slider to the left will make the image
cooler (more blue) and to the right warmer (more
yellow). In contrast the Tint slider is a green to
magenta scale. Moving the slider left will add more
green to the image and to the right more magenta.


Search WWH ::

Custom Search