Graphics Programs Reference
In-Depth Information
RAW SHOOTING
Sharpening, Luminance
Smoothing and Color Noise
Reduction
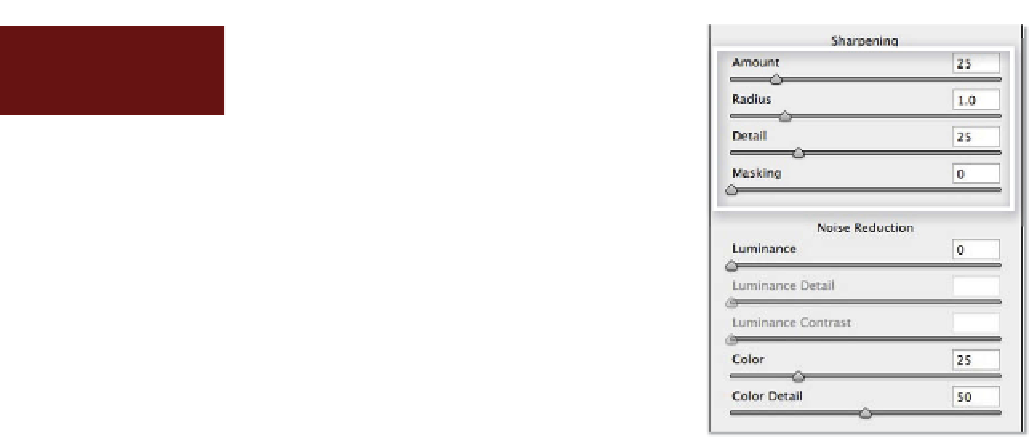
Sharpening (Amount, Radius, Detail, Masking),
Luminance Smoothing and Color Noise Reduction
are all controls that can be accessed under the
Detail tab.
These controls are used to improve the clarity of
the photo. The sharpening sliders make the edges
of the image parts clearer and the noise reduction
controls reduce the appearance of digital grain in
the photo.
Sharpening
Sharpening is an enhancement technique that is easily overdone and this is true even when
applying the changes at the time of raw conversion. The best approach is to remember that
sharpening should be applied to photos as the very last step in the editing/enhancement
process and that the settings used need to match the type of output the photo is destined for.
In practice this means images that are not going to be edited after raw conversion should
be sharpened within ACR, but those pictures that are going to be enhanced further should
have a small amount of subtle sharpening applied in ACR and specific output sharpening
applied later using the specialist filters in Photoshop Elements.
When a picture is first opened into the ACR the program sets the sharpening and noise
values based on the camera type and model used to capture the image. For many photog-
raphers making further adjustments here is an exception rather than a rule as they prefer
to address sharpening in the Editor after cropping, straightening, enhancing, resizing and
going to print.
Sharpening control -
Two new controls have been added to the Detail section of the Cam-
era Raw dialog in recent versions of ACR. These new controls contribute substantially to
the user's ability to fine-tune the sharpening in their images. Added to the existing Amount
(strength of the effect) and Radius (number of pixels from an edge that will be changed in
the sharpening process) sliders is the Detail and Masking controls. Both sliders are designed
to control what parts of the image the sharpening effect is applied to. As with all sharpening
techniques ensure that the preview is set to 100% before playing with the new controls. In
fact, this magnification level is essential if you are to see the masking previews mentioned
below.
Detail -
Moving the Detail slider to the right increases the local contrast surrounding
edge areas and therefore enhances the appearance of details. Moving the slider to the left
decreases the effect and also reduces the appearance of halos.


Search WWH ::

Custom Search