Graphics Reference
In-Depth Information
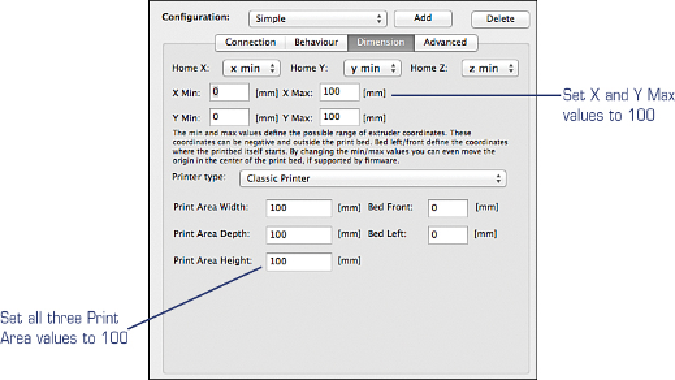
Figure 4.8
Define the dimensions of the Simple's print area.
1.
Set the X Max and Y Max values to 100 (mm).
2.
Set the Print Area Width to 100 (mm).
3.
Set the Print Area Depth to 100 (mm).
4.
Set the Print Area Height to 100 (mm).
These values (100mm) define the boundaries of the area where the Simple's hot
end can deposit melted plastic. Picture a cube sitting on the print bed that's 100mm
on each side, and you'll have a better idea of the maximum size for any object you
want to print with the Simple. If an upgrade kit is ever offered by Printrbot that
allows you to increase the width of the print bed (the X axis), this is where you'd
go to change the value for the X Max and the Print Area Width.
Likewise, if longer metal rods and lead screws were made available for the Z axis,
you could increase the maximum height of any object you could print.
When you're done with the Dimensions tab, click the Apply button and then click
the OK button to save your configurations.
Search WWH ::

Custom Search