Hardware Reference
In-Depth Information
The Physical Setup for Your Prompter
Now turn your attention to the practical setup. You saw in Figure 4-1 that the basic require-
ment is to have a sheet of glass at 45° to the camera, along with the Raspberry Pi's monitor
being lat on its back pointing upwards. It helps here to have a small monitor; although you
might think the ideal would be a 13-inch screen, I quite successfully used a 19-inch TV set for
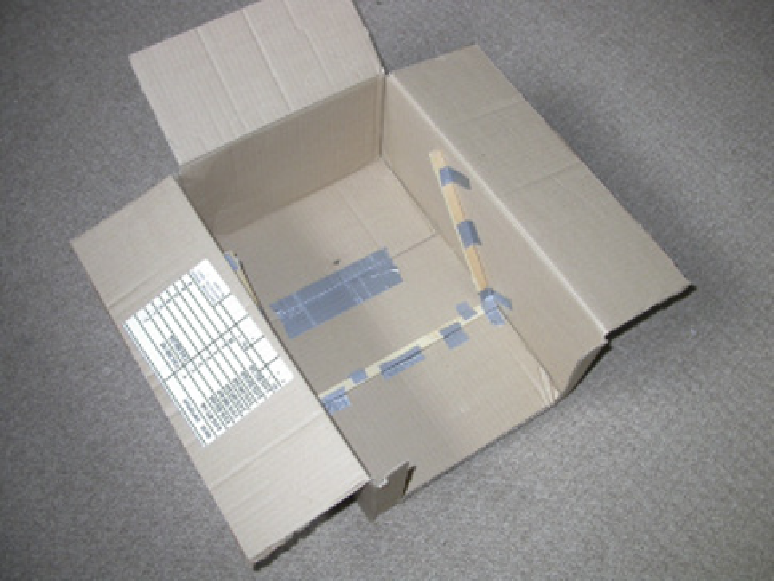
this. his can be physically arranged in many diferent ways, but perhaps the simplest way is
to utilise a large cardboard box and that old standby, duct tape. You can remove one side of
the box with a sharp hobby knife, but you should leave the corners in for strength. I used
three pieces of 1/4˝ × 1/2˝ strip pine duct taped to the sides and base of the box to act as the
holder for the glass, as shown in Figure 4-5.
Figure 4-5:
he irst stage in
building the
autocue.
After that, I slipped a piece of 9 1/4˝ × 7˝ glass from a photo frame behind the wooden strips and
held it on with two small strips of duct tape at the end. Cut a hole in the far end of the box for the
camera lens to poke through. Make sure that there is enough zoom on the camera so that it
doesn't see the edges of the box. I used some plastic IC tubes to reenforce the corners although
you can use 1/2˝ square strip pine, again with liberal amounts of duct tape. Figure 4-6 shows this.