Hardware Reference
In-Depth Information
16 bits of the full data. Because you have four of these chips daisy chained together, you
must do this four times with a diferent variable being used to shift the reading each time.
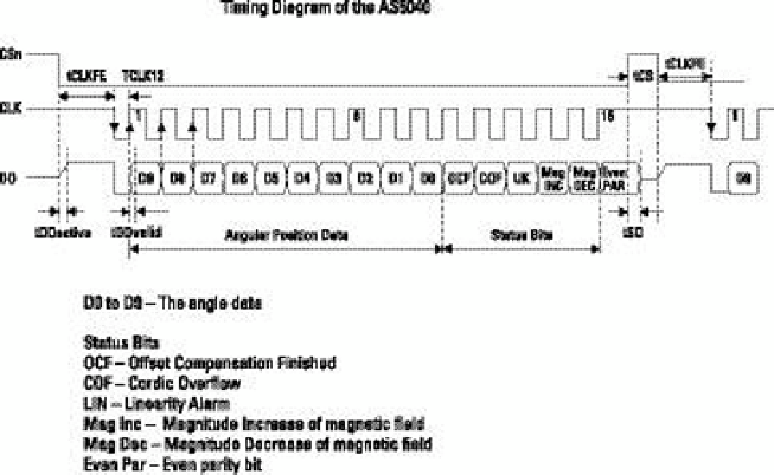
Figure 16-17:
he timing
diagram for the
AS5040
interface.
his is not a topic about C or programming the Arduino, so if you are not familiar with them,
just treat this section as a black box, the way you treat Python libraries - that is to say you know
they work and how to interact with them but you don't know the details of what they do.
After you install the Arduino IDE and program a lashing LED sketch it is time to test out the
sensors and LEDs. It is always good to write something simple to check out the hardware
before trying to make it do too much. So type the code in Listing 16-2 into the Arduino IDE.
Listing 16-2
Hardware Test Code
/* Harmonograph reading four rotary encoder
and test out the LEDs
By Mike Cook Feb-April 2013
Bit banging the SPI
*/
// define SPI pins
#define CS_ENC 10
continued