Hardware Reference
In-Depth Information
However, for a much better result, you can use surface mount components. Not only will
this be smaller, but the light output also will be latter and more even, producing a much bet-
ter distributed level of colour. Surface mount can be a bit scary, but it is not as diicult as you
might think. Despite the fact that the RGB LED I used is not the right pitch for the strip
board, you can easily make it it using a scalpel or sharp knife.
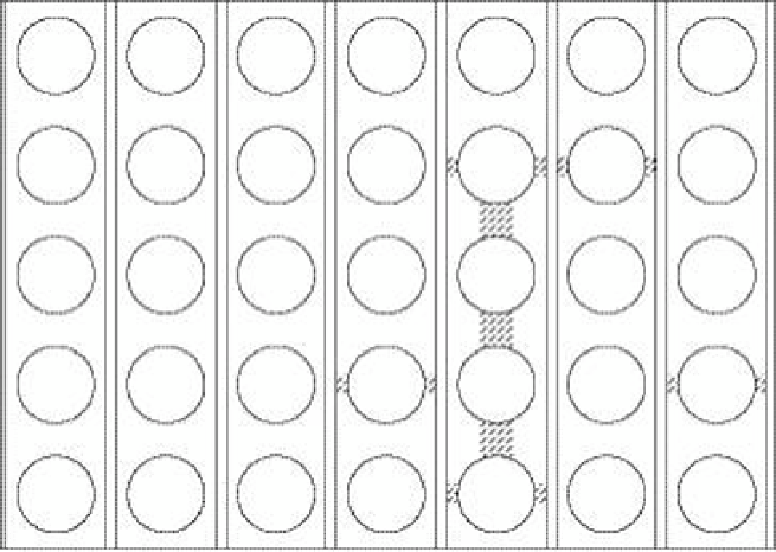
Start of with a piece of 0.7˝ by 0.5˝ strip board with the strips running vertically, as shown in
Figure 8-6. here are some shaded parts in Figure 8-6 that show the area where you are going
to remove the copper. here are two types of cuts you need to make - from the hole to the
edge of the strip and between holes. he irst is the easiest; simply put the point of the knife
in the hole and put the blade at an angle touching the side of the track. With a rotary wrist
movement, cut the copper. his will leave a lake of copper standing up. Remove this by
repeating the action from the other direction, and remove the copper. You need to do this on
both sides of the hole to break the connection.
Figure 8-6:
Cutting out
some of the
copper on a strip
board to make
the LED it.
here are ive holes to cut like this. he next cut is to remove a strip of copper between the
holes. Start with your blade in the hole and score down to the next hole. Repeat this for the
other side of the hole. hen use the blade and lift out the copper between the two score
marks. his sounds complex when written down, but it is actually quite easy to do. In the end
you will have split one of the 0.1˝ copper strips into two 0.05˝ spaced strips.

