Java Reference
In-Depth Information
The size of the Frame, as specified in line 244, does not limit the user to that
size in the running application. The border of the Java frame can be resized by
dragging; using the setBounds() method merely sets the size when the applica-
tion first displays.
The Calculator application now is complete. In the next steps, you will com-
pile and execute the Calculator application and then test the Frame's attributes
and the functionality of the buttons and menus.
Compiling, Running, and Testing the Application
As you have learned, thoroughly testing an application involves trying out all
possible inputs and entering sample data both correctly and incorrectly. In the
next series of steps, you will compile and execute the Calculator application. You
then will enter data and try different kinds of calculations in order to test the
application fully.
Compiling and Running the Application
The image file calcImage.gif is located on the Data Disk that accompanies
this topic in the folder named Chapter06. The following steps compile and run
the Calculator application.
To Compile and Run the Application
1.
With the Data Disk in drive A, compile the program by clicking
Compile Java on the Tools menu. If TextPad notifies you of errors, click
Calculator.java in the Selector window, fix the errors, and then compile
again.
2.
When the program compiles with no errors, if necessary, click
Calculator.java in the Selector window to display the code in the
TextPad window. Click Run Java Application on the Tools menu.
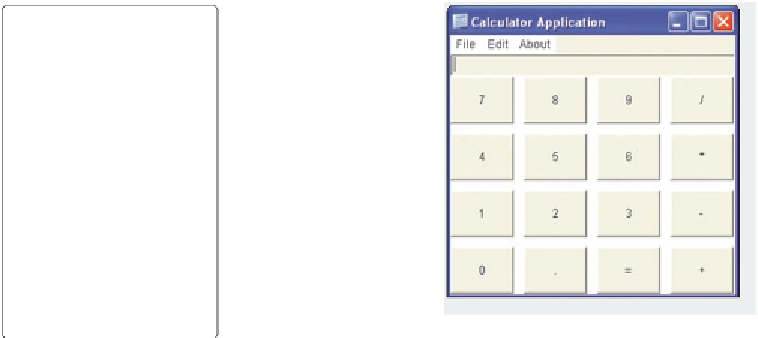
TextPad compiles and runs the program. The Calculator application is dis-
played (Figure 6-38). Your display may differ.
Calculator
Application
window is
displayed
OTHER WAYS
1. To compile, press
CTRL
+
1
2. To compile at
command prompt,
type
javac
Calculator.java
3. To run, press
CTRL
+
2
4. To run at command
prompt, type
java
Calculator
FIGURE 6-38


Search WWH ::

Custom Search