Graphics Reference
In-Depth Information
°
°
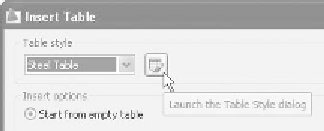
Select the predefi ned
Table style
name.
If you did not create a table style before this step, simply click the small
button next to the list, so you can start creating the desired table style.
°
Specify the
Insert options
. You have three choices:
Start from an empty table—normally, this option should be used.
Import from a data link—to bring in data from spreadsheets created in
an application like Microsoft
®
Excel.
Import from object data in the drawing (
Data Extraction
)—use only if
you have block attributes.
There are two insertion methods:
Specify insertion point
Specify window
°
Specify Insertion Point
If you use this method, you will need to specify the upper left-hand corner
of the table and set up the following data accordingly:
Number of columns
Column width
Number of rows (without title and column heads)
Row height (in lines)
Click
OK
and AutoCAD will prompt:
°
°
Specify insertion point:
°
Specify the upper left-hand corner of the table and the table will appear
ready to fi ll the data in each row.
First you will fi ll the title, then the column headers, and then the data. You
can move between rows using the [Tab] key to go to the next cell and the
[Shift]+[Tab] keys to go back to the previous cell.
°
Specify Window
If you use this method, you will be asked later to specify a window. You must
specify a total height and a total width.
°