Graphics Reference
In-Depth Information
°
After you have made your selection, you will be able to do two things:
Remove boundaries
: you will most likely need this button when using
Add:
Pick points
.
Add:
Pick points
will select all the inner objects
and text as islands and this button will allow you to remove some of the
selected objects as islands.
View Selections
: use this button to view the selection set to make sure
that it is the right one.
7.4 PREVIEWING THE HATCH
°
The data input is now complete, you have selected the hatch pattern along
with its parameters, and you have selected the area to be hatched. The next
step is to preview the hatch before you make the fi nal decision to accept the
outcome.
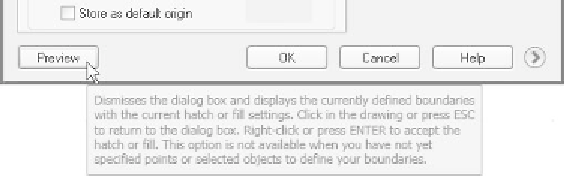
Click the
Preview
button located at the lower left-hand corner of the dialog
box:
°
°
°
The dialog box will disappear temporarily.
You will see the results of your settings (i.e., hatch pattern, angle, scale,
islands, etc.). Accordingly, AutoCAD will prompt you to:
Pick or press Esc to return to dialog or <Right-
click to accept hatch>:
°
If you like what you see, right-click or press [Enter], otherwise, press
[Esc].