Graphics Programs Reference
In-Depth Information
Exercise 2.2: Cartoon Surface Shading
Step 1: Getting started
Open the file
2_2_Shading.fla
in the Chapter 2 folder. The superhero on the Stage
was traced from a scanned drawing. There are many ways to create artwork such as
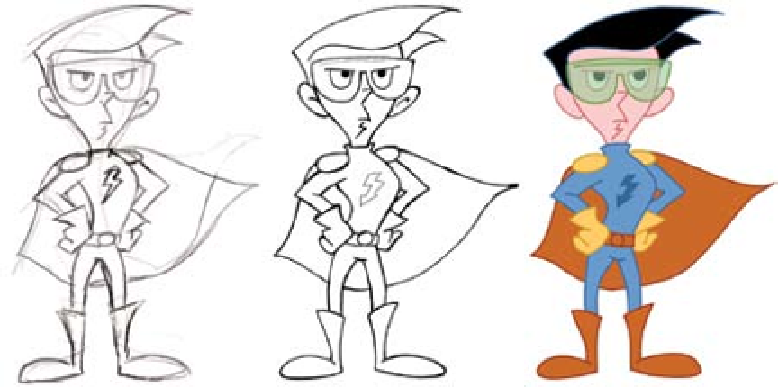
a cartoon character in Flash. Figure 2.17 illustrates the process used for this exercise.
A rough pencil sketch was first created to define the basic shape of the superhero (left
image). The outlines were then cleaned up using a black pen (middle image).
The outlined superhero was scanned into Photoshop at 300 dpi to retain as much detail
as possible. The scan was saved as a JPEG and imported into Flash. The imported scan
was placed on its own layer in the Timeline. The layer was locked to prevent it from
accidentally moving. New layers were created above the locked layer. The scan was
then retraced using the pencil tool and filled in with basic colors (right image).
Figure 2.17
Evolution of a Flash cartoon character
After the scanned drawing was traced, it was deleted from the Timeline. What's left are
several layers that contain separate body parts of the superhero. Figure 2.18 shows
the stacking order of the layers. Why separate your character into so many layers? The
answer is more control, especially for animation.
Flash cartoon characters should be composed of several layers. It is good practice to
create a different layer for each body part. The benefit you gain is more flexibility in
adjusting or changing your character. If you plan to animate, the layers provide you
with the ability to fine-tune each part's movement. The number of layers is up to you.
They will not increase the file size of your document.


Search WWH ::

Custom Search