Graphics Programs Reference
In-Depth Information
This basic example showcases the process of creating 3D graphics using Swift 3D. It
was divided into four stages. The first stage was the creation of the 3D model. Here we
created the “Flash 3D” extruded text and added a bevel. Next, materials were applied
to the surface of the model. A spinning animation was applied next. Finally, the render-
ing process produced the animation that was imported into Flash. This just scratches
the surface of Swift 3D's capabilities.
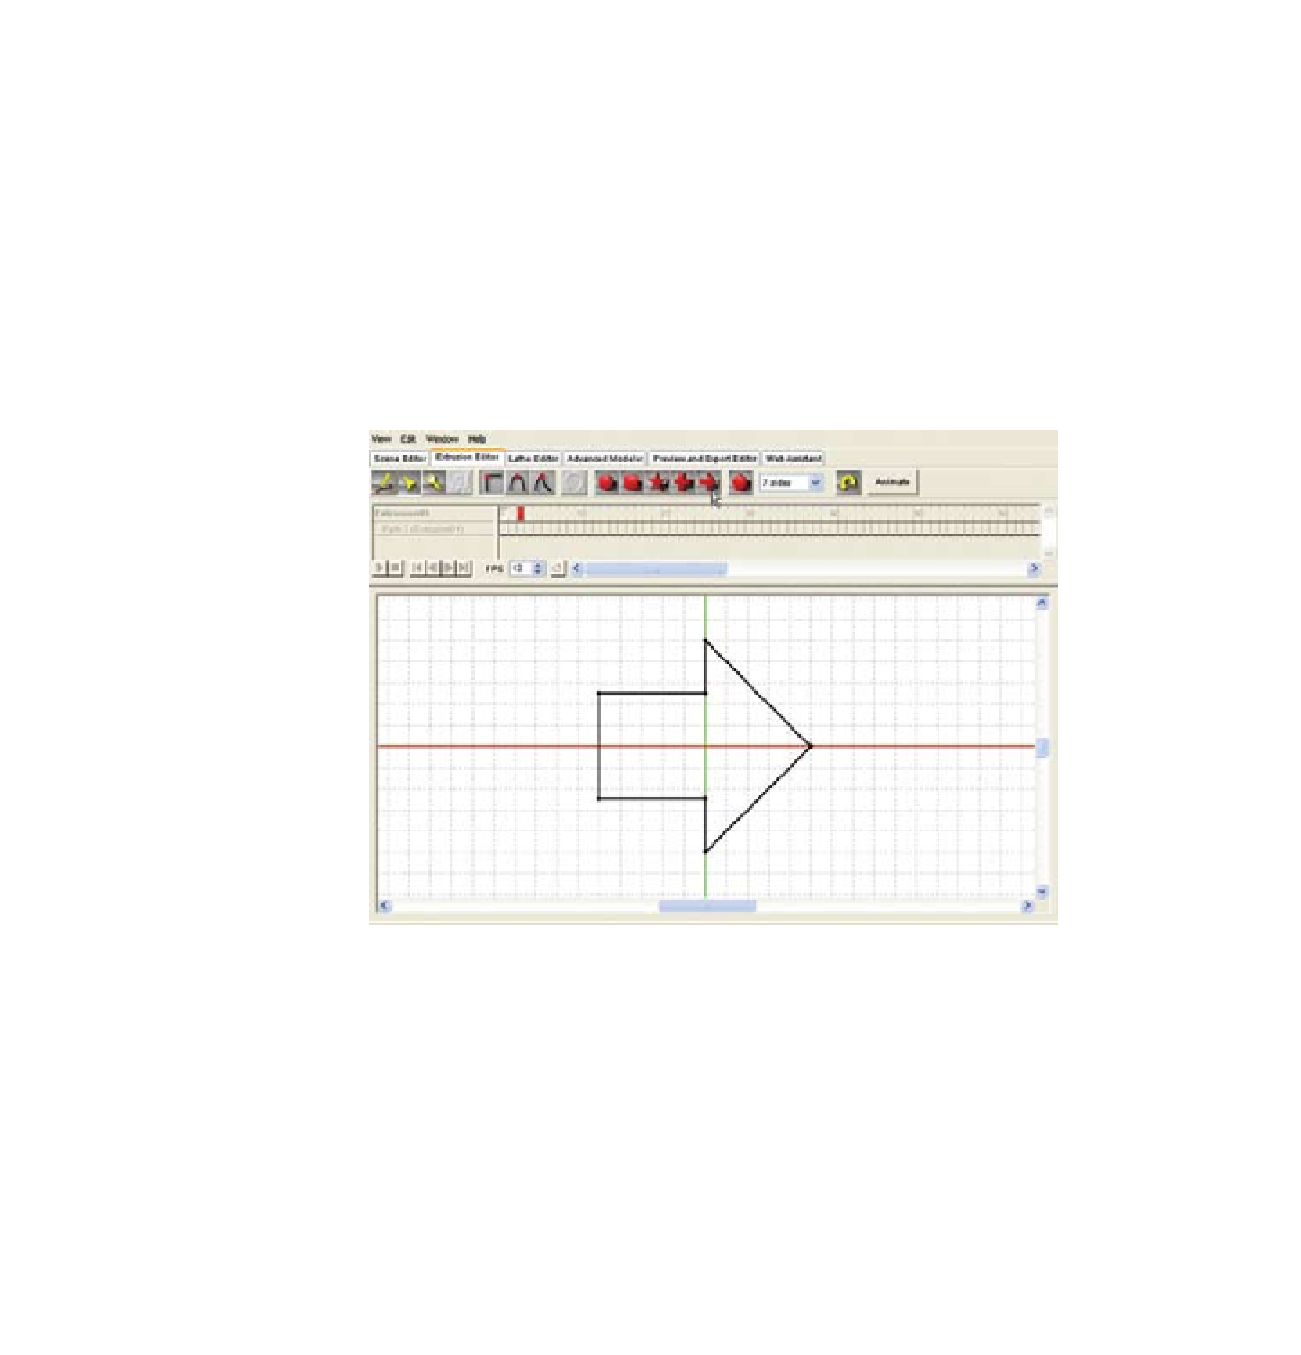
There is an Extrusion Editor that creates extruded objects (Figure 10.18). Select the
Extrusion Editor tab to load its interface. You can use preset geometric shapes, create
custom shapes, and import EPS files to be extruded. The completed path is automati-
cally extruded for you. You can alter the extrusion through the Scene Editor.
Figure 10.18
Extrusion Editor in Swift 3D
The Lathe Editor allows you to create revolved 3D objects. A vertical green line in the
Viewport represents the Axis of Rotation. Its position is offset from the center of the
Viewport. Using the drawing tools, draw the profile shape of your object on the right
side of this line. Once you have completed the path, Swift 3D spins it 360 degrees
around the Axis of Rotation.
The strength of this 3D software is its ability to build 3D models and animation that
can be optimized for Flash. For more information and tutorials regarding Electric Rain's
Swift 3D, visit their website at
www.erain.com/products/swift3d/
. You can also
download a trial version of the software.
Search WWH ::

Custom Search