Graphics Programs Reference
In-Depth Information
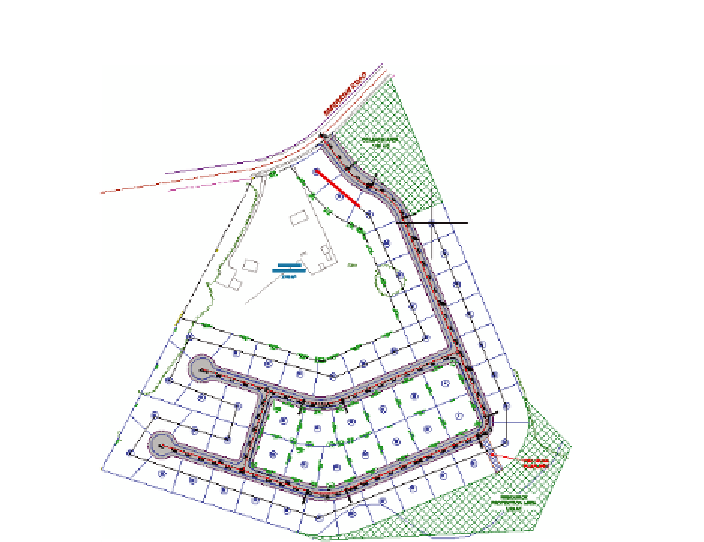
Notice that the start-
ing number is 41. The
command remembered
that you stopped at
40 during the previous
renumbering process.
FiGuRE 13.6
Selecting parcels in the order they are to
be renumbered
▶
7.
In the Renumber/Rename Parcels dialog box, check the box next to
Use Name Template In Parcel Style. Click OK.
▶
8.
Draw lines through the parcels as you did before, beginning at lot 68,
drawing in a clockwise fashion and ending at lot 62. Press Enter twice
to end the command.
These lots should now
be numbered from
41 to 53.
9.
Press Esc to clear the previous selection. Click one of the lot labels,
and then click Add Tables
➢
Add Area on the ribbon.
You may need to resize
the dialog box or scroll
to the right to see the
Apply column where
the box can be checked.
10.
In the Table Creation dialog box, do the following:
a.
For Table Style, select Area Only.
b.
Under Select By Label Or Style, check the box in the Apply
column that is across from Lot Number.
▶
c.
Click OK.
▶
11.
Click a point in an open area of the drawing to insert the tables.
A new set of tables
is inserted.
12.
Save and close the drawing.
You can view the results of successfully completing this exercise by
opening
Creating an Area Table - Complete.dwg
.