Graphics Programs Reference
In-Depth Information
This is a drainage
easement for install-
ing a storm pipe that
leads to the creek.
These parcels are now outlined in green and hatched with a green
crossing pattern.
7.
Zoom in to the 90° bend on Jordan Court, and note the narrow
Standard : 1 parcel located there.
◀
The color of the parcel
outline changes to blue
and displays with a
smaller dashed pattern.
8.
Change the style of the Standard : 1 parcel to Easement.
The area is hatched with a diagonal stripe pattern.
9.
Click one of the remaining parcels that is still labeled Standard, and
change its style to Lot.
◀
10.
Go to Prospector, and expand Sites
➢
Lot Layout. Click Parcels to
display all the parcels in the item view at the bottom of Prospector.
This selects all parcels
that have a style of
Standard assigned
to them.
11.
Scroll to the right until you can see the Style column. Click the Style
column heading to sort the parcels by style.
12.
Click the first parcel with a style of Standard. Then press and hold the
Shift key, scroll down, and select the last parcel with a style of Standard.
◀
13.
Right-click the Style column heading, and select Edit. In the Select
Style dialog box, select Lot and click OK.
◀
In the Prospector item
view area, you can
make multiple edits by
selecting multiple rows,
right-clicking a column
heading, and selecting
Edit. There is a pause
as all the parcels in the
drawing are updated.
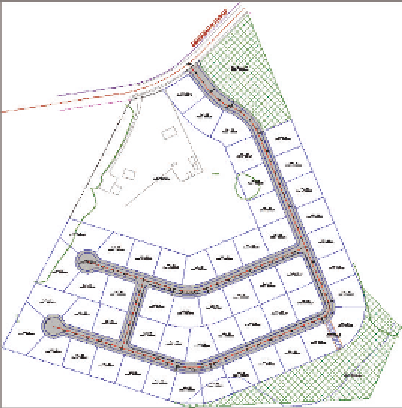
Now, all the parcels you
selected in Prospector
have been assigned
the Lot style (see
Figure 13.1).
14.
Save and close the drawing.
You can view the results of successfully completing this exercise by opening
Applying Parcel Styles - Complete.dwg
.
FiGuRE 13.1
A view of the project after all the
parcels have been assigned the appropriate styles