Graphics Programs Reference
In-Depth Information
▶
7.
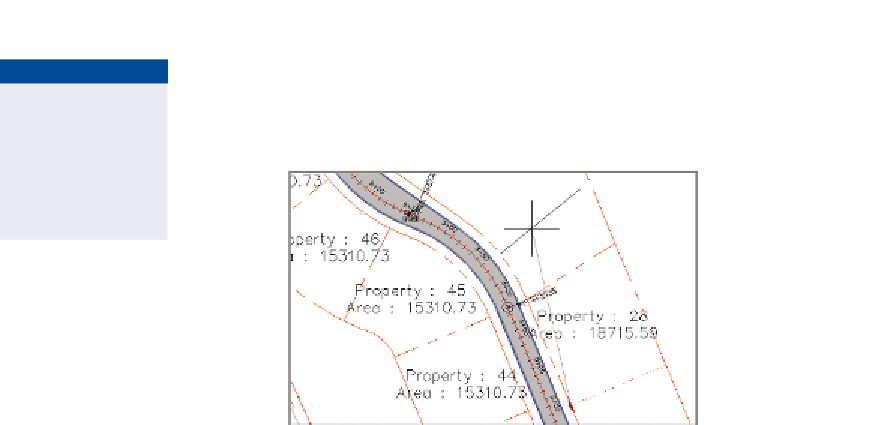
Click the diamond-shaped grip, and slide it along the parcel line it's
attached to. Slide it north to the curved areas, and notice how it stays
perpendicular to the parcel segments it's attached to (see Figure 12.15).
If the line isn't sliding
along smoothly, it might
be because you have
running object snaps
turned on. Try pressing
F3 to turn them off.
FiGuRE 12.15
As it's moved with the diamond-
shaped grip, the parcel line stays perpendicular to the parcel
segments it's associated with.
8.
Pick a new location for the line, and note the change to the parcel label.
9.
Save and close the drawing.
You can view the results of successfully completing this exercise by opening
Editing Parcels Using Grips - Complete.dwg
.
Editing Parcels using the Edit Geometry
Commands
When you need to modify the parcel lines and curves themselves, you can use
the commands found on the Edit Geometry panel of the Parcel ribbon tab. The
commands included on this panel are as follows:
insert Pi
Inserts an angle point into a parcel line segment.
Delete Pi
Removes an angle point from a parcel line segment.
Break
Creates a gap in a parcel segment.
trim
Shortens a parcel segment using some other entity as a cutting edge.
Join
Joins two parcel segments together.
Reverse Direction
Changes the direction of the parcel segment.
Edit Curve
Allows you to change the radius of a parcel curve segment.