Graphics Programs Reference
In-Depth Information
To create area type, you click with the Type tool ( ) where you want the text and drag to
create an area type object (also called a
text area
). You can also convert an existing shape
or object to a type object by clicking the edge of an object (or inside the object) with the
Type tool. When the cursor appears, you can type. An area type object has two extra boxes
on the bounding box, called ports. Ports are used to thread (flow) text from one type area
to another, which you will learn about later in this lesson.
Next, you will create an area type object and enter more text.
Note
The Zoo Sign view is at the bottom of the View menu, and you may need
to scroll.
1.
Choose View > Smart Guides to turn on the Smart Guides.
2.
Choose View > Zoo Sign to zoom in to the black shape at the bottom of the art-
board that will become a zoo sign.
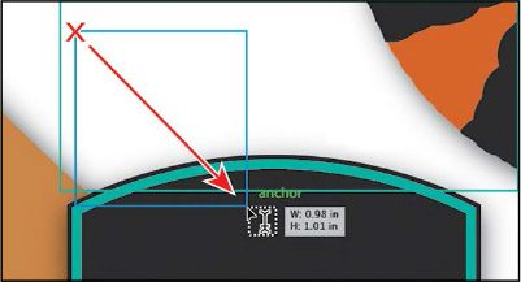
3.
Select the Type tool ( ). Position the cursor to the left of the striped orange-and-
black tail, in the white area (see the red X in the figure). Click and drag down and
to the right to create a text area with an approximate width and height of 1 inch.
4.
With the cursor in the new text area, type
Safari Zoo California
.
Notice how the text wraps horizontally to fit within the type area. By default, when
you create area type by dragging with the Type tool, the type area will not resize to
fit the text within (similar to how InDesign treats text frames, by default). If there
is too much text, the text that doesn't fit will not be visible and will be considered
overset.