Hardware Reference
In-Depth Information
Wiring Up Your Arduino
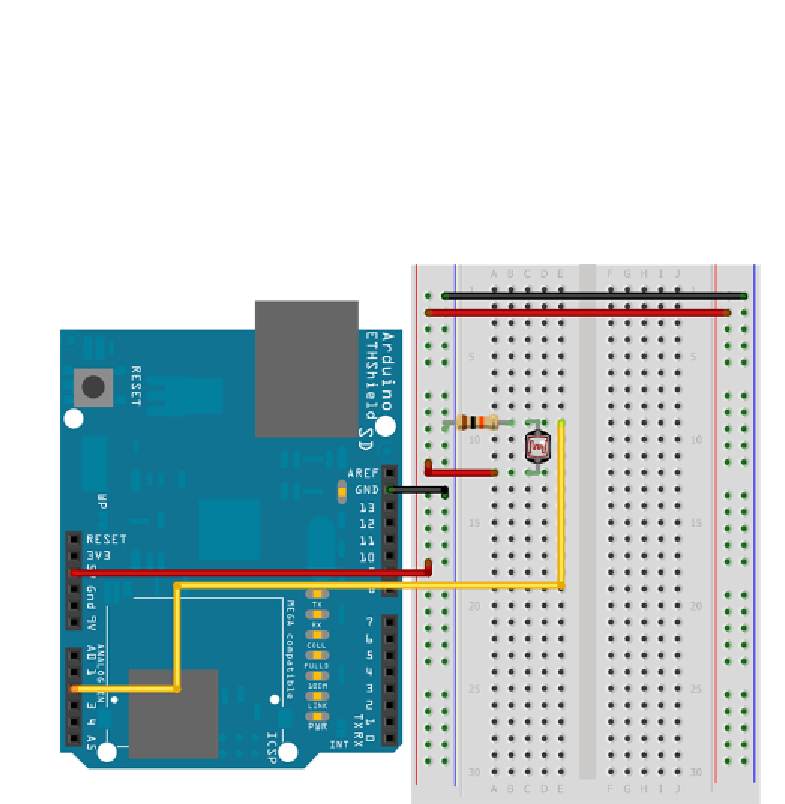
Next, wire an analog sensor to analog pin 2 of your Arduino. The example sketch
that you just downloaded is configured to read an analog input on analog pin 2
and broadcast it up to your Xively account. To keep things simple, grab a pho-
toresistor and 10k resistor and wire them to analog input 2 as a voltage divider,
just as you did in Chapter 3, “Reading Analog Sensors” (see Figure 14-7). Once
it's wired up, plug your Arduino into the computer and your network.
Figure 14-7:
Arduino with Ethernet shield wired to photoresistor
Configuring the Xively Sketch and Running the Code
You've already installed the appropriate libraries and opened the example
sketch. You now need to configure, compile, and run the code on your Arduino.
First, you will configure the sketch to talk to the feed on your Xively account.
You need to change only three values in the sketch to get it to work with your
Arduino and your Xively feed: the MAC address of your Arduino Ethernet Shield,
your Xively API key, and your Feed ID. The MAC address will be the same MAC
address that you used for previous examples. (As before, if you cannot find your
Search WWH ::

Custom Search