Hardware Reference
In-Depth Information
In the case shown in Figure 14-4, the Arduino was assigned local IP address
192.168.0.9. This number will almost certainly differ on your network, so be sure
to check what it is! Note this IP address; you will now need to use it to access
the web interface that you have just launched.
ControllingYourArduinoviatheNetwork
Now that the server code is running, and your Arduino is connected to the net-
work with a valid IP, you can access it with a browser and control it. First, you
do so over your local network, and then you learn how you can take advantage
of port forwarding in your router to access it from outside of your local network.
Controlling Your Arduino over the Local Network
To confirm that the web interface is working properly, ensure that your computer
is attached to the same network as your Arduino (via Wi-Fi or Ethernet). Open
your favorite browser, and enter the IP address from the previous section into
the URL bar. This should open an interface that looks just like the HTML page
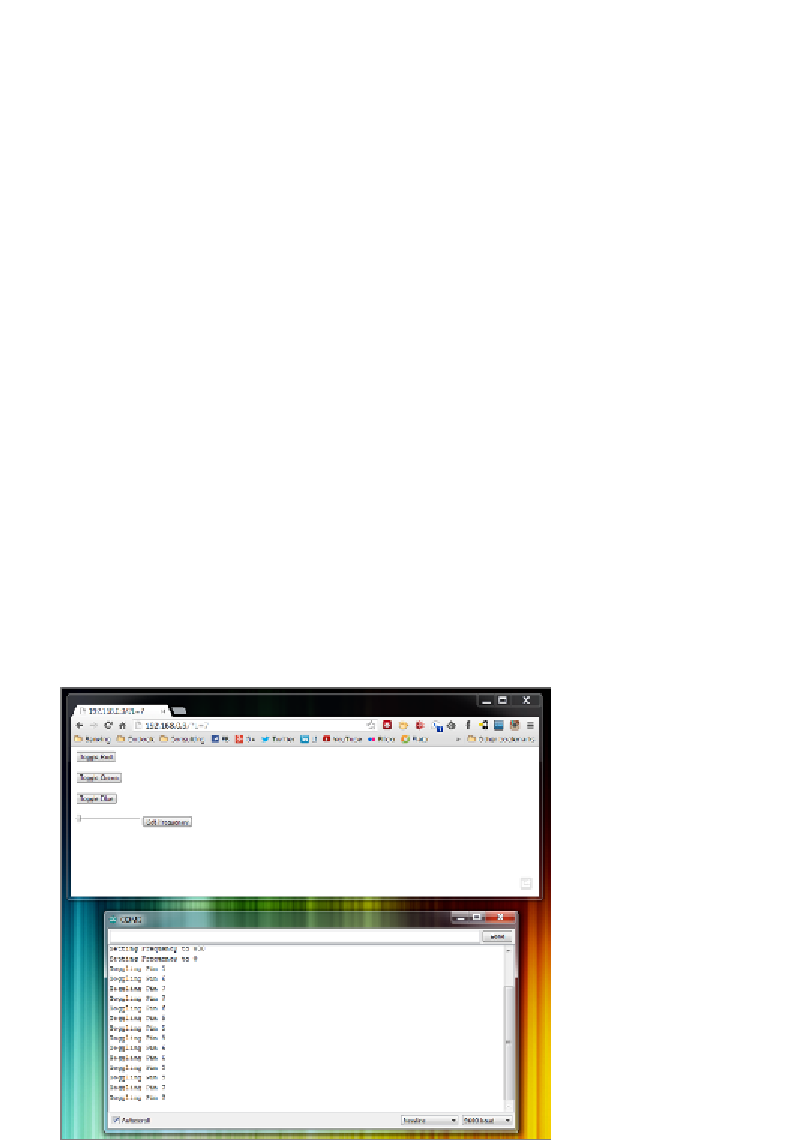
you created earlier. Try pressing the buttons to toggle the various LED colors
on and off. Move the slider and hit the frequency adjustment button to set the
frequency of the speaker. You should see and hear the Arduino responding. If
you've left the serial monitor open, you'll also see it displaying debug info as it
receives commands. Notice the GET commands being passed to the Arduino
server through the browser's URL bar (see Figure 14-5).
Figure 14-5:
Arduino control web page and serial debugging
Search WWH ::

Custom Search